
Introduction
The Zentitle LAN daemon is a local server, usually running on a virtual machine, whose purpose is to manage the licenses of client applications running on a local area network (LAN.)
This LAN may or may not be connected to the internet and so it need not be able to contact the Zentitle server. As such, it is ideally suited to license management scenarios involving dark sites or where internet access is otherwise limited or restricted.
The LAN daemon is to be distinguished from the Zentitle relay daemon. The relay daemon serves as a link to the Zentitle server. Its purpose is simply to pass data between the client machines and the Zentitle server where all license management is carried out. The LAN daemon, on the other hand, provides a local implementation of much of the license management functionality of the Zentitle server.
Although the daemon must interact with the server to enable and disable license codes, this can be carried out with offline activation/deactivation if need be and the actual activation and deactivation of client machines are carried out solely on the daemon. As such, it is more useful in dark site situations where the LAN has no internet connection and so cannot directly contact the Zentitle licensing server.
Software Configuration
Download Components
The components of the Zentitle LAN daemon can be downloaded from the Network page of the Zentitle Dashboard (accessed from the 'wrench' drop-down menu.)
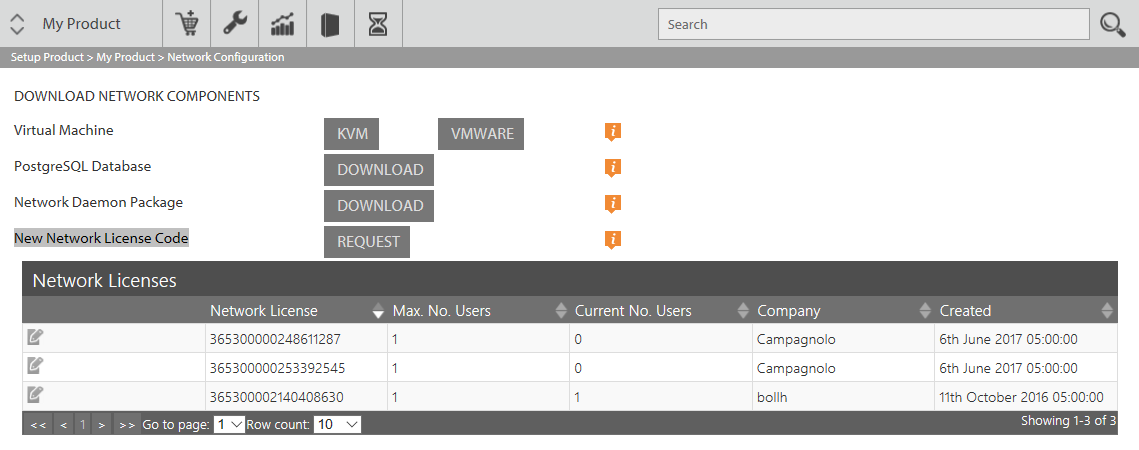
In the Download Network Components part of the page, there are three items that should be downloaded:
- A Linux virtual machine disk image, where we provide a choice of KVM and VMWARE formats.
- A PostgeSQL database, which will be installed on the virtual machine.
- The Zentitle Daemon package, which will also be installed on the virtual machine.
See the Licensing the Network Daemon section below for a description of the other items on this page.
Daemon Installation
Installing the Disk Image
On the Network Configuration page, choose either the KVM or the VMWARE image according to your preference, and the file will be downloaded. The KVM image is provided in the .raw format while the VMWARE image is provided as a .vmdk virtual disk. Please consult the documentation for your chosen virtualization platform for details on how to import virtual machine images in the required format. The default login credentials for the VM are:
- username="root"
- password="nalpeirondaemon".
For security, you are advised to change these as soon as possible.
Installing the Daemon Components
After the virtual machine has been installed, copy into it the database and daemon RPM files. This can be done, e.g., by setting up a shared directory using VMWare Tools or by using Samba. Then install the packages by entering the following commands in a shell:
yum -y install <database rpm file>
yum -y install <daemon rpm file>
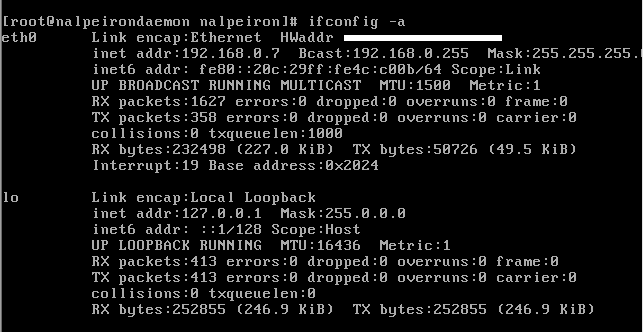
Following installation, the daemon should be accessible on your network. To obtain the daemon's IP address, type the following command into a command shell:
ifconfig -a
The daemon IP address is that associated with the default network device (eth0 below) and we see that here it is 192.168.0.7.
At the daemon IP address you should see the following login page:
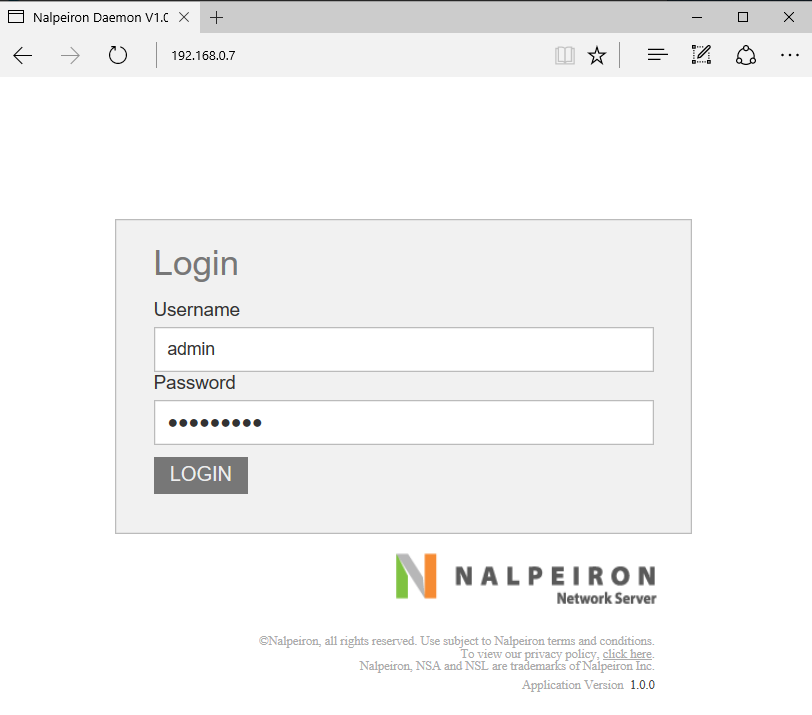
The default username and password are 'admin' and 'nalpeiron' respectively. We will subsequently see how to change the admin password and how to add new users.
Daemon Status and Settings
On logging in you will be presented with the daemon status and settings page as shown below.
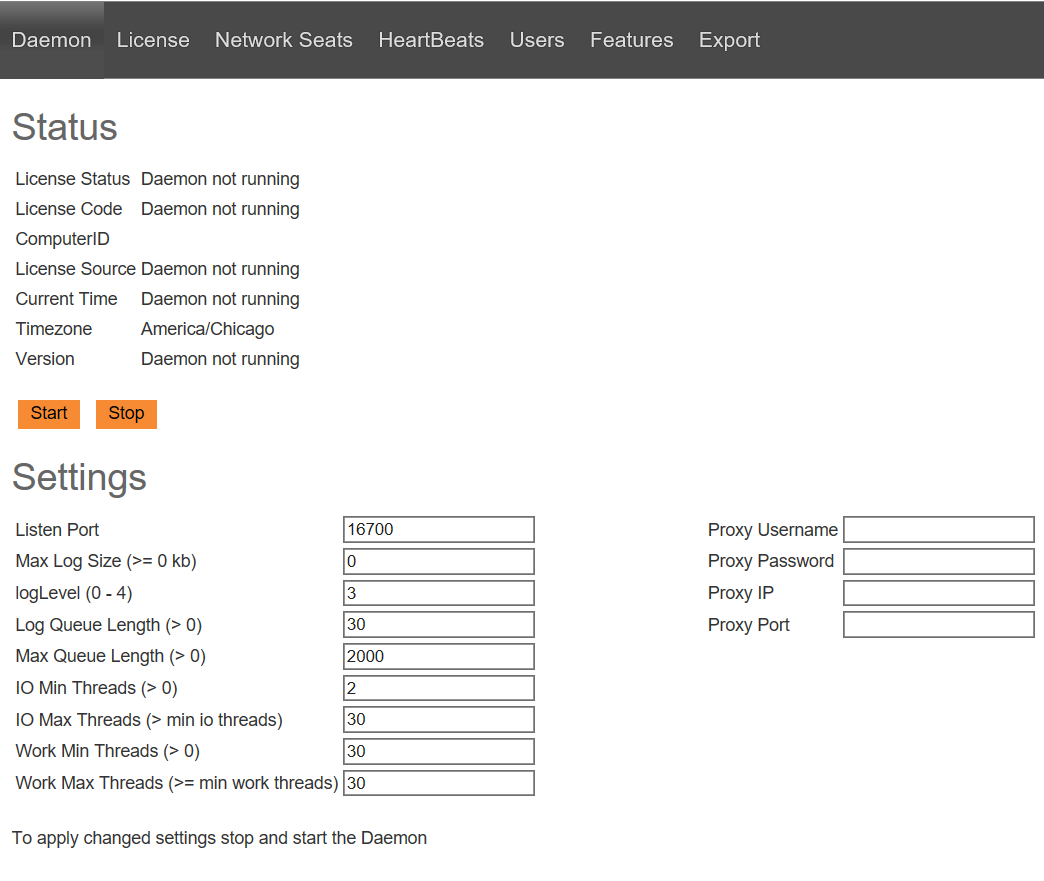
This page provides status information and the values of several configuration settings for the daemon. The status fields are as follows:
- License Status: Whether the daemon is running and, if so, whether or not it is licensed.
- License Code: Daemon master license code (see below.)
- Computer ID: ID of the virtual machine on which the daemon is running.
- License Source: The domain name of the Zentitle server from which the daemon master license code has been obtained.
- Current Time: Current time of the Zentitle Server.
- Timezone: Timezone of the Zentitle Server.
- Version: Daemon version number.
The configuration settings are as follows:
- Listen Port: This is the port on which the daemon listens to the clients. The default value is set to 16700.
- Max Log Size: Maximum length of the log file on disk in bytes. When the log file reaches this size it is truncated to zero length. The default value is 0 (ie unlimited growth allowed).
- logLevel: Level of logging detail (0-4.) Level 4 should always be used for diagnostics/Zentitle support tickets. A value of 1 is sufficient for non-debug purposes.
- Log Queue Length: Maximum length of the log queue (number of entries waiting to be logged.)
- Max Queue Length: Maximum size of the connection queue (ie client's waiting in line to be answered).
- IO Min/Max Threads, Work Min/Max Threads: Parameters which govern the ability of the daemon to handle IO requests and perform internal tasks. The higher the values, the more client machines can be handled although the more demanding this will be of the VM. The daemon manages the size of its thread pool within these bounds.
- Proxy Username/Password/IP/Port: If the daemon is connecting to the internet via a proxy server, use these values to specify the IP address, port number and, if necessary, user credentials for the proxy server. If no proxy is used, these can be left empty or completely unspecified. The default is no proxy.
Once the daemon has been suitably configured and started, the next step is to set up the daemon licensing.
Licensing the Network Daemon
Acquiring a Master License Code
The Zentitle LAN daemon requires, in addition to a license code for each product it serves, a (different) master license for each daemon instance. These are obtained from the Zentitle server itself and may then be activated using either an online or offline activation procedure.
To obtain a Master License, return to the Network Configuration page on the Zentitle dashboard, go to New Network License Code and click the Request button. A pop-up will appear enabling you to associate this license with a particular company.
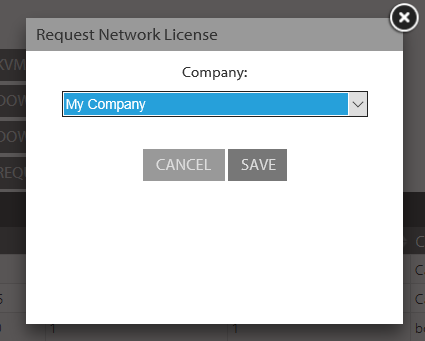
You can choose the 'None' option if you wish. You can also associate multiple master licenses with the same company. This will be useful if you have a customer who operates a number of dark sites each of which requires a daemon.
You will now be able to see your new license on the Network Licenses table.
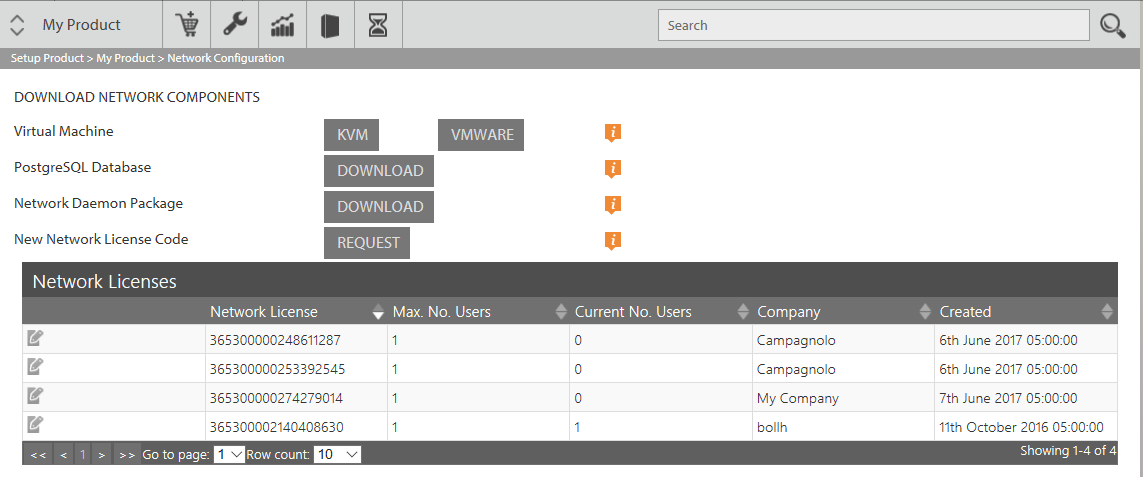
Note the fields in this table:
- Network License: This is the master license code for a particular daemon instance.
- Max. No. Users: This is the maximum number of daemon instances that can be activated with this master license. It has been set to always have the value 1.
- Current. No. Users: This is the current number of daemon instances that have been activated with this master license.
- Company: If any, the company you associated this master license with.
- Created: The created date of this master license.
Note also that each license code has a corresponding  button. This edit button enables you to change the company.
Online Master License Activation/Deactivation
On the daemon License page indicated on the navigation bar
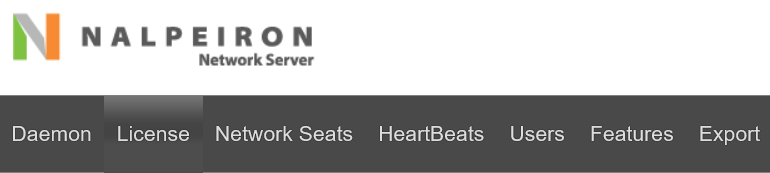
you will see a Master License section whose current information shows that the daemon is not licensed:

To license the daemon, select 'Get License Online' from the drop-down and click the orange arrow. This will present you with a popup form in which to paste the master license code you acquired from the server.
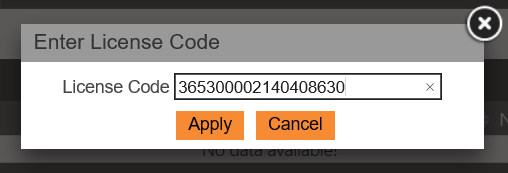
Clicking the 'Apply' button will license the daemon, as will be shown on the page

To return the license online, which will deactivate the daemon, all that is required to perform this task is to select Return License Online from the Master License drop-down menu. The current number of daemon activations will be immediately updated on the Zentitle server.
Offline Master License Activation/Deactivation
The offline activation and deactivation procedures for the LAN daemon are similar to those employed for client applications. Here, the daemon is analogous to a client application.
To proceed with an offline activation, on the Master License drop-down, select the Create Activation Request item and click the orange arrow button.
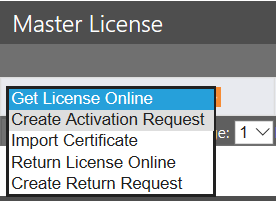
This will prompt you to enter the master license code obtained from the server as in the online case. Following this, you will be presented with an activation request certificate to be pasted into the server.
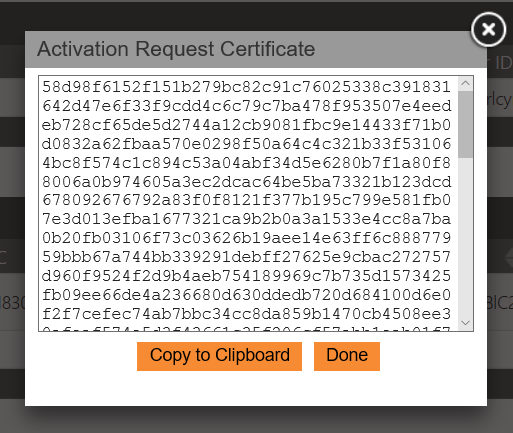
Instructions for doing this and subsequently obtaining the server certificate are provided in the offline activation documentation.
On obtaining an activation certificate from the server, go back to the Master License drop-down on the daemon, select the Import Certificate item and click the orange arrow button.
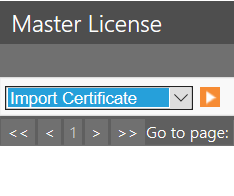
This will present you with a form in which to paste the server certificate.
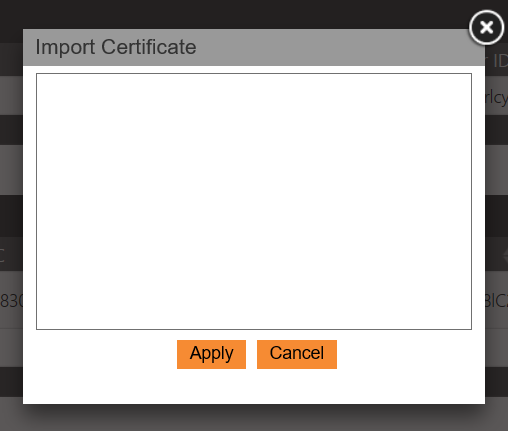
Clicking the Apply button will complete the offline activation process.
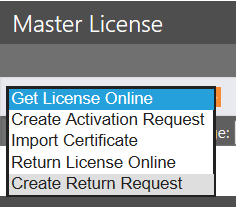
Offline deactivation proceeds by first selecting the Create Return Request item on the master license drop-down and clicking the orange arrow.
After entering the license code, you will be presented with a Return Request certificate:
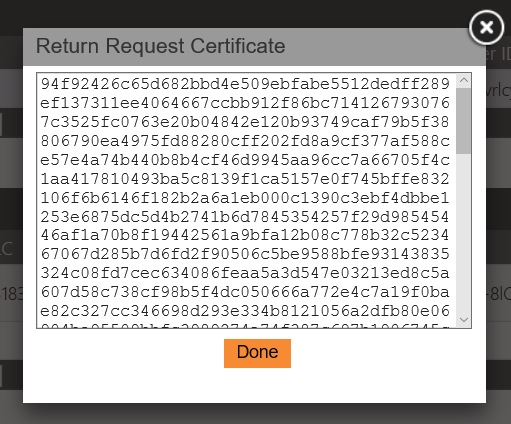
This should be pasted into the server in accordance with the deactivation instructions given here.
This is all that is needed to deactivate the master license code. However, it can be reactivated at any time by following one of the methods described above.
Product Setup
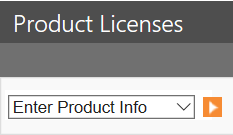
To set up one of your products on the daemon, on the daemon License page, go to the Product Licenses drop-down on the License page and select the Enter Product Info item.
You will then be presented with a dialog to enter your customer ID and Product ID. Your Product ID should be the last 5 digits (omitting any leading zeroes) of your 10 digit product code, that is, it should be exactly the same as the product ID you hard-coded into your application.
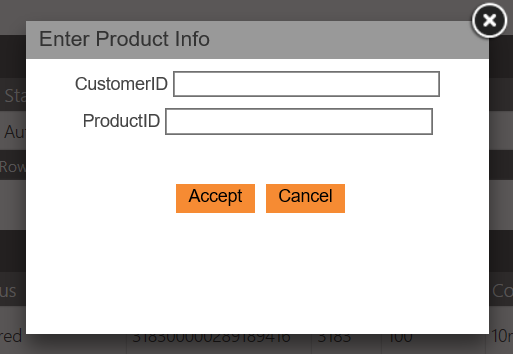
Click the Accept button to complete the product setup.
Product License Configuration
In addition to a master license code, it is necessary to provide a product license code for each of the product's setup on the daemon. This is a normal license code for your chosen product. However, it must be configured correctly on the Zentitle server in order to be activated on the daemon.
To configure a license code for the daemon on the Zentitle server, go to the license code's 'edit' page on the Zentitle dashboard (see here for more details) and click the Options tab.
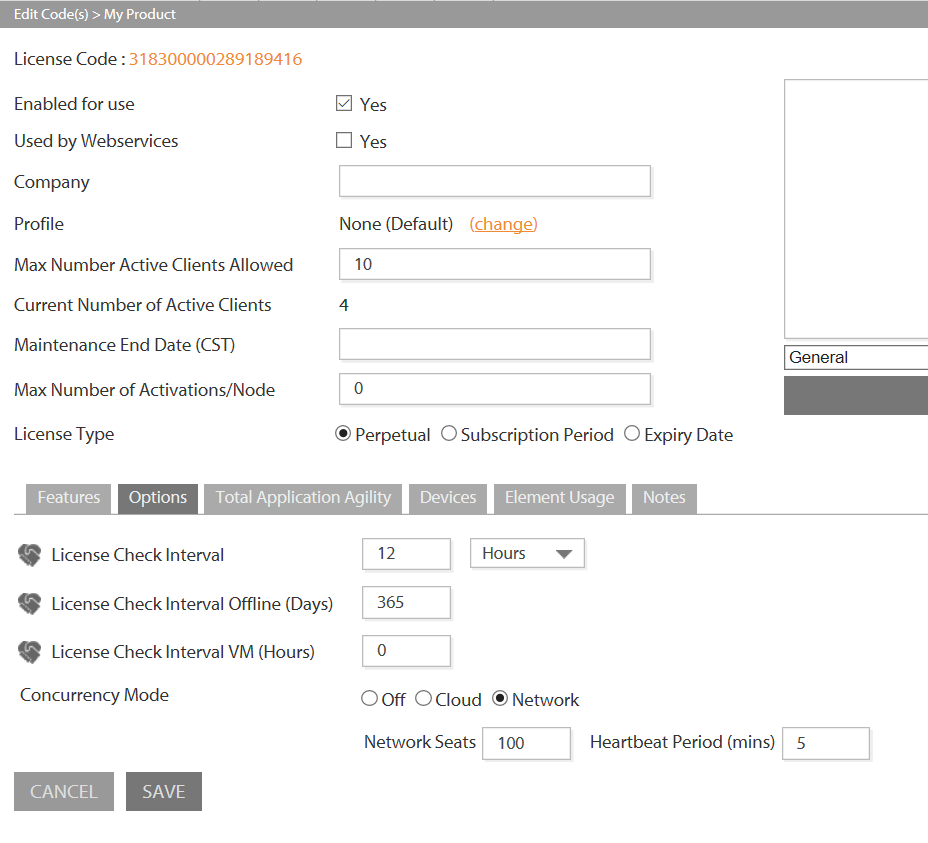
The concurrency mode must be set to Network and values must be set for the following fields:
- Network Seats: This is the total number of concurrent activations of this license code that can be managed by one or more daemons. It may take any value from 1 to 9999.
- Heartbeat Period (mins): This is the time interval between successive contacts between the client application and the daemon. It may take any value from 5 to 9999.
If the license is not perpetual, i.e. if an expiry date or a subscription period is set, then this determines when the code expires on the daemon(s) and thereby on all client machines.
Online Product License Activation/Deactivation
The steps to carry out online activation and deactivation for a product license are similar to those we took for the master license. On the daemon license page, go the Product Licenses drop-down, select the Get License Online item and click the orange arrow. This will present you with a popup in which to paste the product license code you configured on the server.
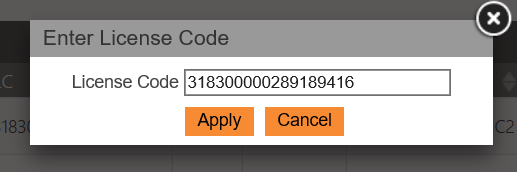
Clicking the 'Apply' button will license the product, as will be shown on the product licenses section of the License page.

The Product Licenses section of the page displays, in addition to the License Code (LC), the following information: (License) Status, the Customer and Product IDs, the Computer ID of the daemon, the current number of active clients (Net Seats) out of the total number allowed.
It also displays the current number of Long-Term Check Out (LTCO) and Original Equipment Manufacturer (OEM) active clients (to be described in more detail below.) Finally, it displays the Expiry date of the license.
The Expiry date on License page is not the absolute expiry date set on the license code edit page on the Zentitle Server. It is when the current license check interval ends. When this occurs, the license code will show as 'Expired' and will have to be reactivated according to the above procedure. When the absolute expiry date has been reached, the license code can no longer be activated on the daemon without first extending its activation period on the Zentitle server.
To deactivate the license code, all that is required to perform this task online is to select Return License Online from the Product Licenses drop-down menu.
Offline Product License Activation/Deactivation
For offline activation and deactivation, the steps for product licenses are similar to those of the master license. Offline activation proceeds by going to the product license drop-down and selecting Create Activation Certificate and clicking the orange arrow button as shown:
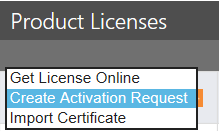
This will then prompt you for the product license code as shown above. On entering this, the activation request certificate will be generated.
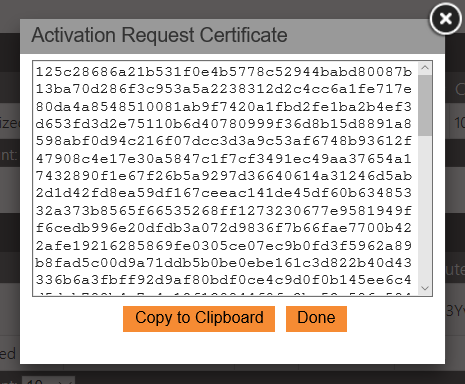
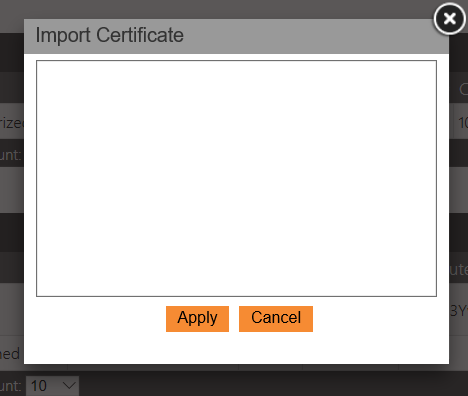
This should be pasted into the server using the offline activation procedure. The server will return a certificate which is used to complete the offline activation procedure on the daemon in the following way. On the product license menu on the daemon, select the Import Certificate item and click the orange button
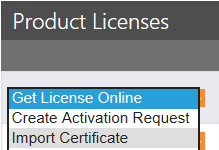
After entering the license code, you will be presented with a box in which to apply the certificate from the server. Clicking Apply will complete the offline activation procedure
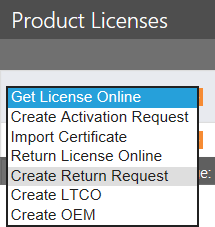
For offline deactivation, on the Product Licenses drop-down, select the Create Return Request option.
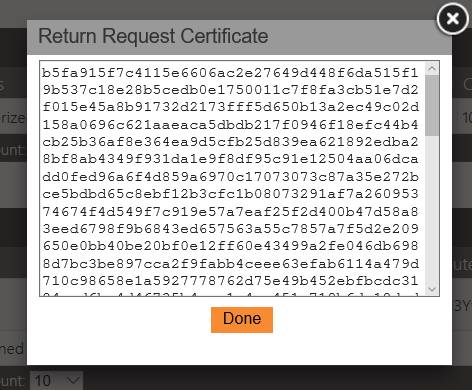
This will deactivate the product on the daemon side. It will present you with a deactivation certificate to import into the server to complete the process on the Zentitle server.
You will see in the Product Licenses section of the page that the license has been returned to the server.

Managing Users
On the Users page of the Zentitle daemon server, you can manage the users who's software is permitted to make use of the daemon. On installation of the daemon, there will only be one user, the admin user, who has permission to administer the daemon server and use the daemon. You may create additional users, however, they will only have the latter permission.
The Users page will initially have the following appearance:
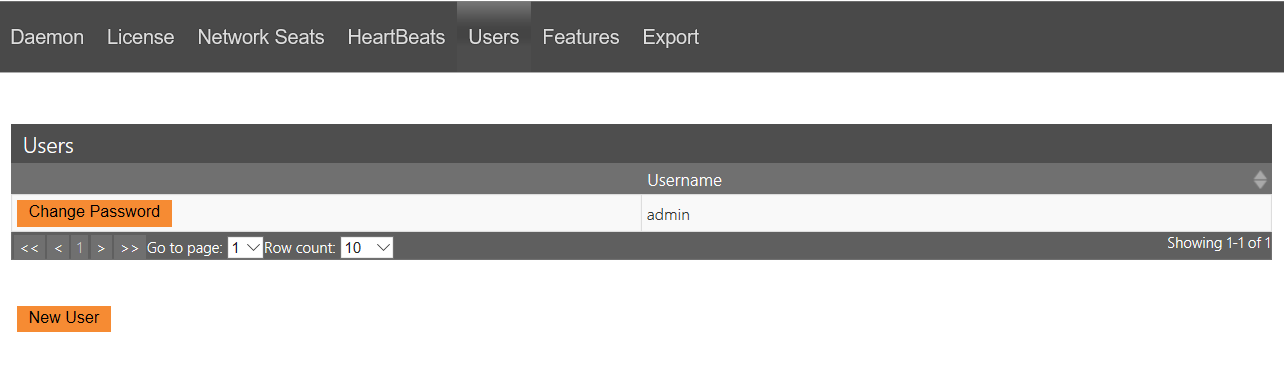
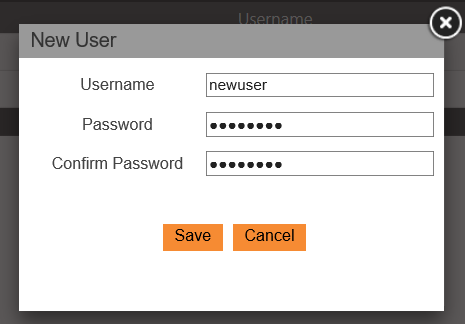
Clicking the New User button will present you with a popup in which to add the credentials of your new user.
On doing so, you will see your new user added to the list.
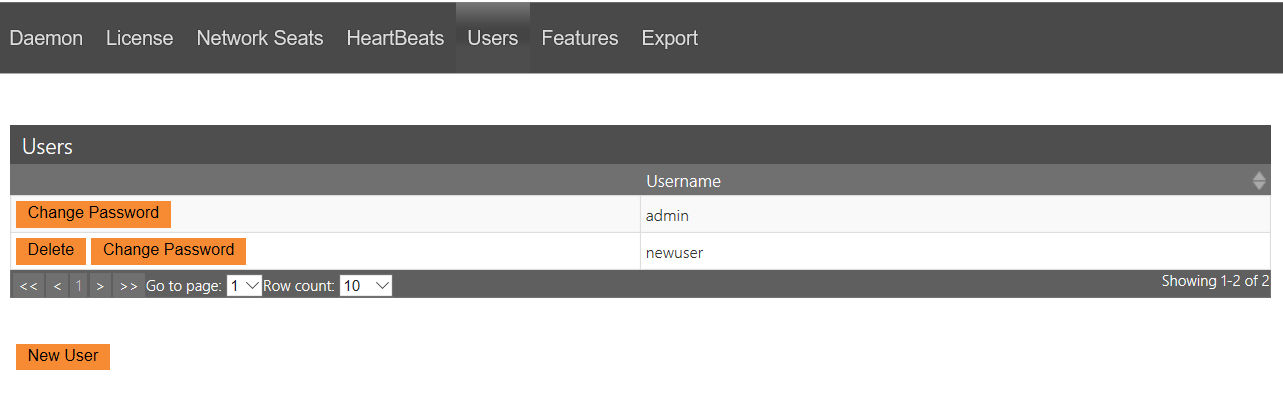
Note that you can also delete this user by clicking the Delete User button and that the admin user cannot be deleted. The password for any user can, however, be changed. To do so click the Change password button.
Client Application Activation
Application Setup
Having set up your product and users, you can now configure your client application to use the daemon. Have your application pass the following parameters with the values shown into the NalpLibOpen() function. For more details on how to call this function, see the client API documentation.
| Parameter | Value |
|---|---|
| DaemonIP | The local IP address of the daemon on your LAN. In this documentation, its value is 192.168.0.7. |
| DaemonPort | The port on which the daemon is listening. The default is 16700. |
| DaemonUser | Username. |
| DaemonPass | User password. |
Connected Clients
If your client application is connected to the same LAN as the daemon and has been configured as above, the license code should be set to 'netseat'. On execution, you should automatically see records appear for this client on the daemon server (see the Client Application Data section below.)
Long-Term Checkout (LTCO) Licenses
An LTCO (Long Term Checkout) license is a license that will have no heartbeat, i.e. the licensed machine will not contact the daemon again after it has been activated. This license can, for example, be used on a laptop that will not be on premises for some time. Some restrictions to keep in mind are:
- The LTCO license cannot last longer than the expiration of the license it is created from.
- The license will cause a network seat to be subtracted from the seat pool.
- An active LTCO (checked out) cannot be destroyed until the LTCO expires or it is returned by the client that used it.
- An LTCO is restricted to a specific client computer with a fixed computer ID.
To create an LTCO, select the 'Create LTCO' item on the license drop-down menu and click the orange arrow button:
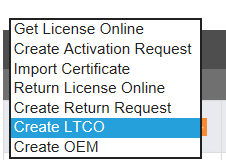
This will present you with a popup dialog in which to enter the computer ID of the machine you wish to license and also the expiry date of the license:
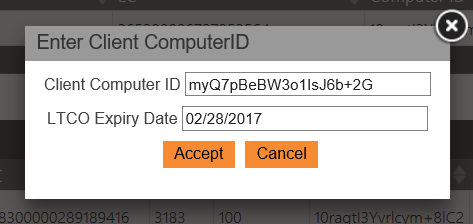
This will create an LTCO license for the computer you have specified. An entry for this license will appear in the Long-Term Checkout Licenses section of the Licenses page:

To complete the LTCO activation, the license code shown in the LC column (here '7622...') must be applied to the client, i.e. in this case we do not use the 'netseat' license code.
The license should only be returned on the server (by selecting the 'Return' item on the above drop-down) if it has expired or been returned by the client.
Client Application Data
The daemon UI provides various pieces of information relating to client applications which have been activated using the daemon. These can be accessed from the top navigation bar. We shall describe these in turn.
Network Seats
The Network Seat page has an entry for each activated client, as shown below.
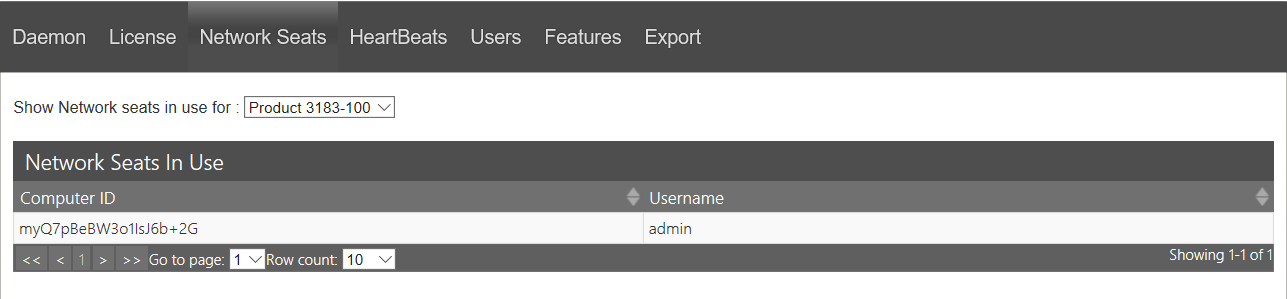
Each entry consists of the computer ID and username of the client. These entries are filtered using the drop-down at the top of the page. The entries in the drop-down consist of your customer ID (in the example above 3183) and the short product ID, which is the product ID you would have hard-coded in your application.
HeartBeats
The client application contacts the daemon with a period given by the heartbeat you set on the Zentitle server. The default value is 5 min. The HeartBeats page provides information about heartbeat connectivity for each client, as shown.
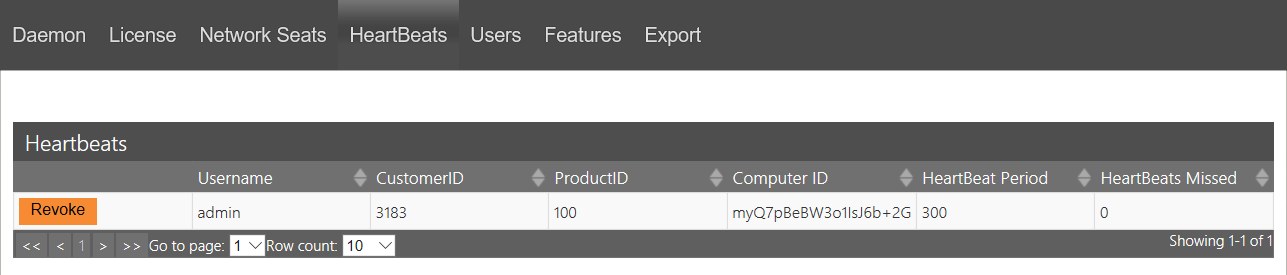
In addition to providing the key parameters for each client (Username, Customer, Product and Computer IDs) the heartbeats table also provides the heartbeat period in seconds and the number of heartbeats missed. The daemon automatically deactivates any client that misses more than three heartbeats. When the client is deactivated its seat is returned to the pool.
Each entry also has a 'Revoke' button enabling the client to be deactivated. If a client's license is revoked it will be notified next time it heartbeats to the daemon. In general, this will mean a delay of one heartbeat period before the client is notified of revocation.
If the daemon is shut down while clients are connected and heartbeating, it will cache these heartbeats and restart them when the daemon itself is restarted. However, the number of missed heartbeats is not saved and the count will restart at zero.
Features
The Features page provides information about the usage of element pools and floating features.
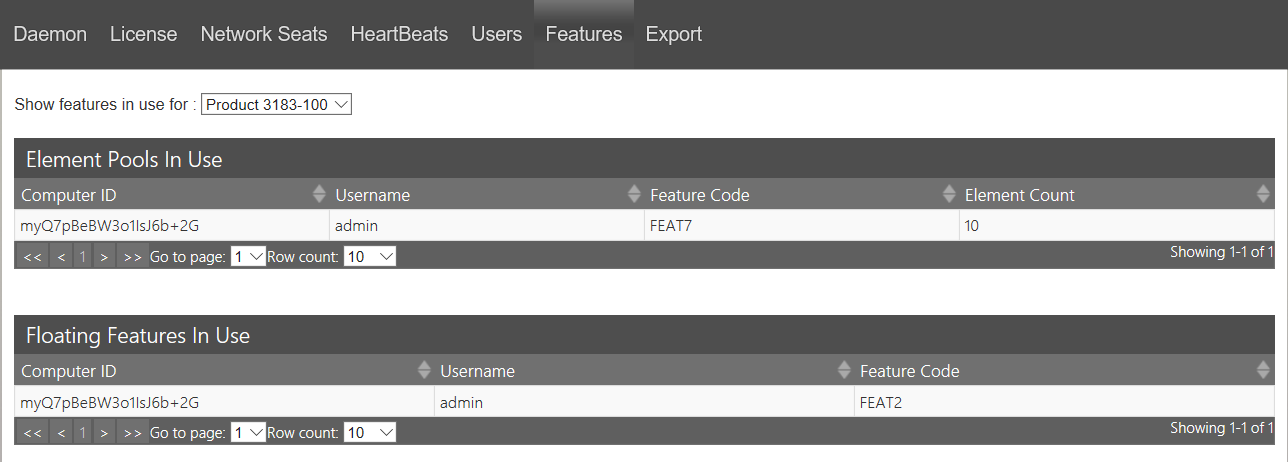
There is an entry of each feature type for each usage, providing the Computer ID, the username and the feature code.
For element pools, the number of elements checked out is also provided.