Introduction
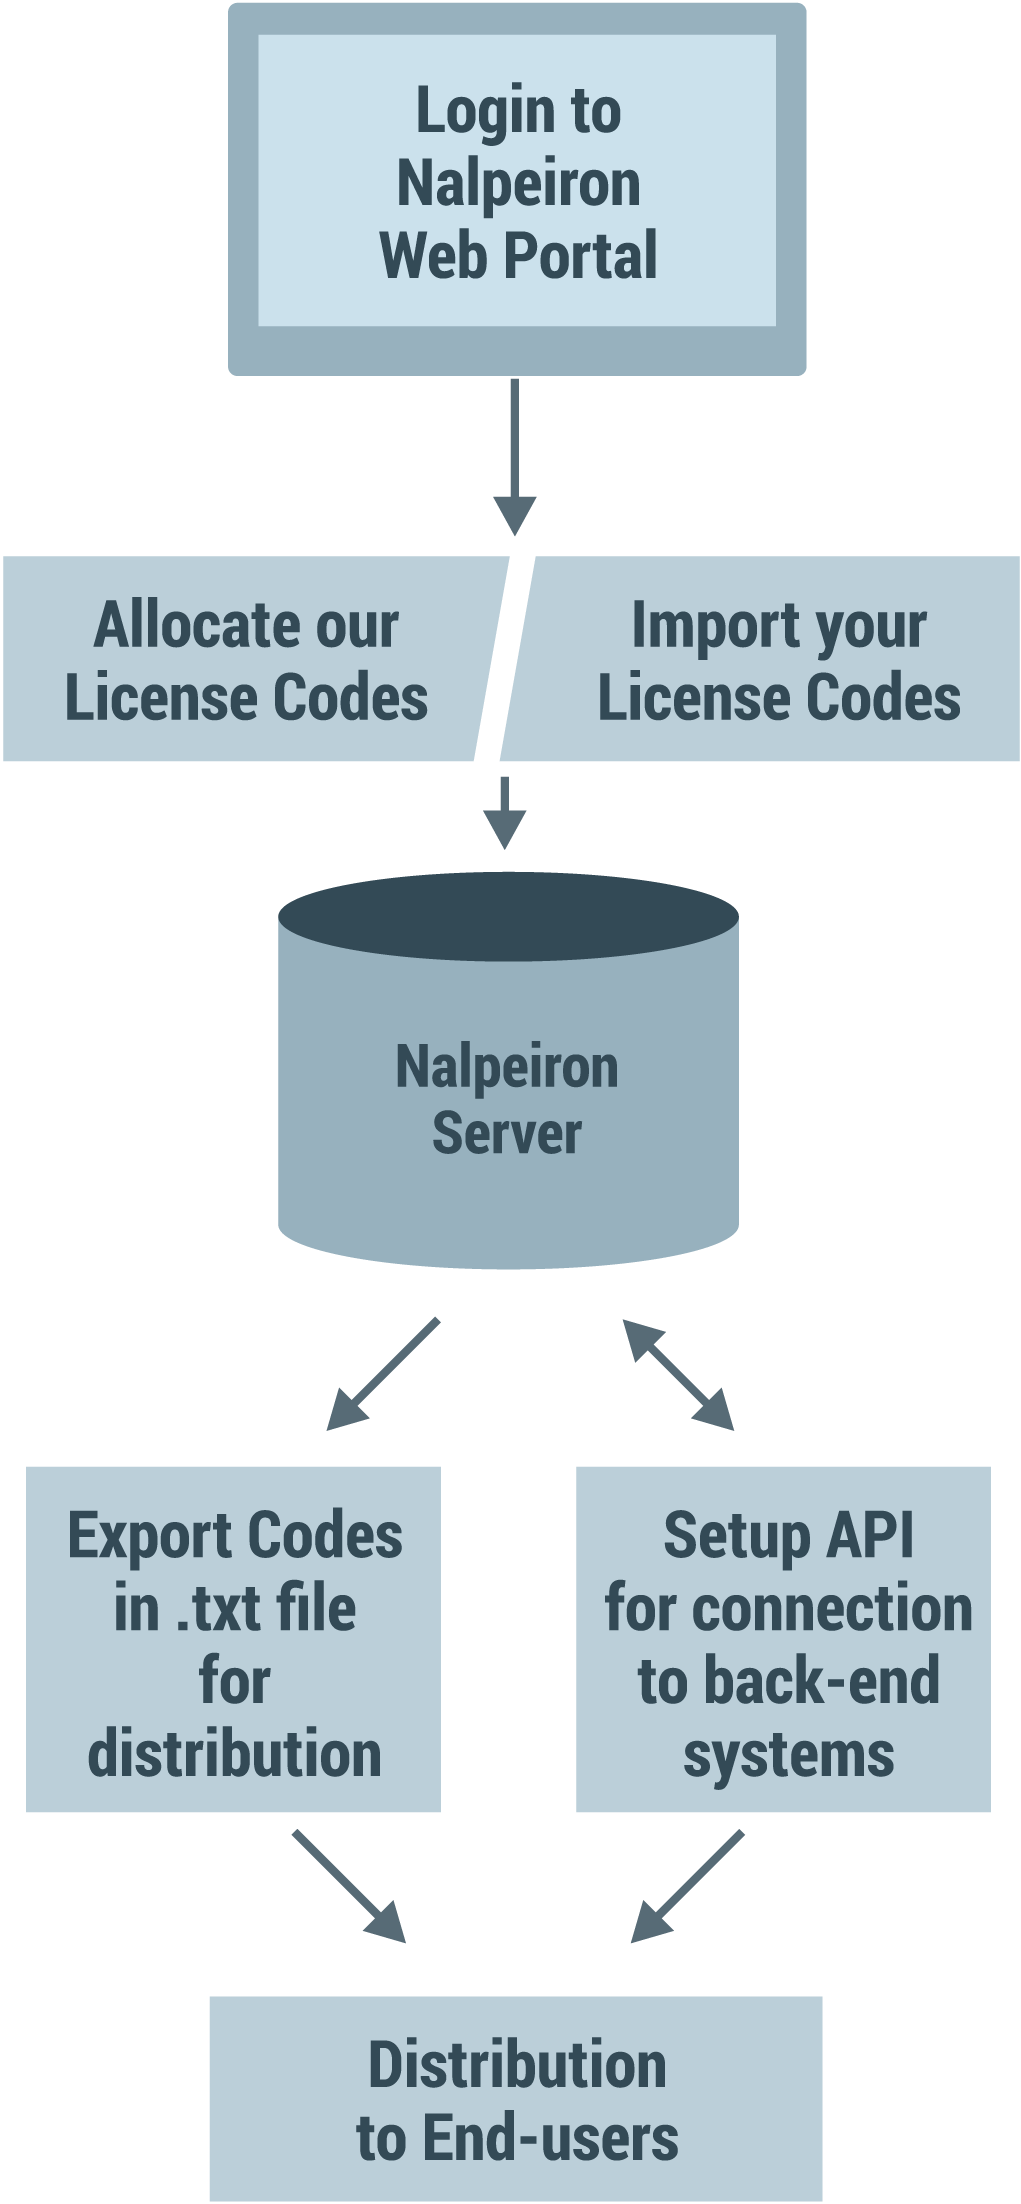
Once you have setup up your products in the system you can move on to allocate license codes to your products in NLS from your license “code bank”.
The “code bank” is the total amount of license codes you added to a when you set up the system (you can add codes at any time if you have an unlimited account and they go into you "code bank" at that time) and these are available to apply to any of your "profiles".
Allocating codes to products and profiles
To get started please ensure you have the credentials to hand you got sent with your trial or account purchase and proceed as below.
1 Login to my.nalpeiron.com
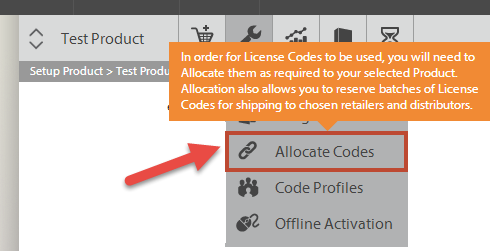
2 Select the product you wish to edit from the product toolbar.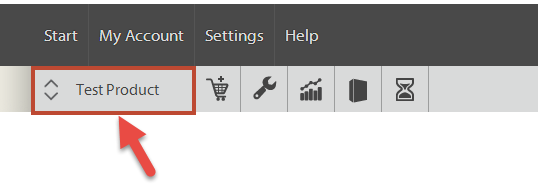
3Click the Configure drop-down menu.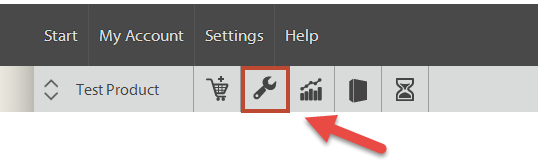
- Then select "allocate codes"
Once you are on the "allocate codes" section the first decision, you need to make, is whether you are migrating to Zentitle with your own codes, or you going to use the Zentitle license codes as your primary means of license code generation.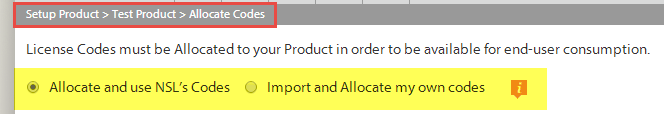
If you prefer to use your own codes you will need to import them from a pre-prepared text file, click here for more details on "Migrating to Zentitle" (opens a new window).
See below for the two choices and the processes required for code allocation for each.
You may also wish to set up "license code profiles" before taking this step, learn more about license code profiles (opens a new window).
Allocate and use NSL’s Codes
If you are using the Zentitle generated codes (default) then you will see the following options on the screen.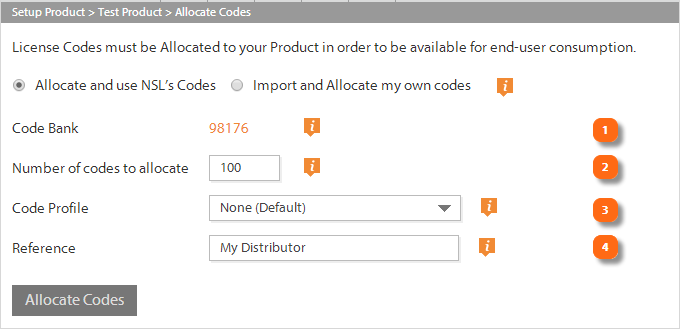
1Code Bank - This is the total amount of Codes you have available to allocate.
This number can be modified within the product toolbar "cart" option. If you have an unlimited account then you can codes to the bank at any time, learn more about that in the topic "managing my account".
2Number of codes to allocate - Enter the number of Codes you wish to allocate to this Product.
3Code Profile - If required, please select a Profile for these codes to inherit their properties from
In addition to allocating codes against a single ProductID and the related license rules and rights, you can segment the codes under a ProductID into separate groups called “profiles”. As you can see above, during the code allocation process you get an option to choose a profile, with the standard profile being <Default>. This profile is a general purpose profile and allows a mixture of code types and parameters. Think of profiles as “folders” and codes as files in the folders. The folder defines the “files” license parameters when first placed in the folder. But the file can change at a later point due to end users updating the files. Codes can be moved between profiles if they have not been used. Once a code has activity it cannot be moved to another profile.
Each profile applies to a specific Product in the system. You can create a range of profiles to help you manage the codes in the system and to sub-divide a product's allocated codes into groups with different license rights. You may set up profiles in advance and then use them in the code allocation process.
Learn more about license code profiles.
4Reference – you can name the batch of codes you are allocating, this helps so that after allocation you can easily track the purpose of each Allocation and easily identify this batch of License Codes if you wish to download them in a text file later (available further down the Allocate Codes page once you have Allocated them).
Import and Allocate my own codes
Zentitle allows you to configure licensing to match (or change) existing Users entitlements within our system, and then to match existing license codes (keys) that users already use.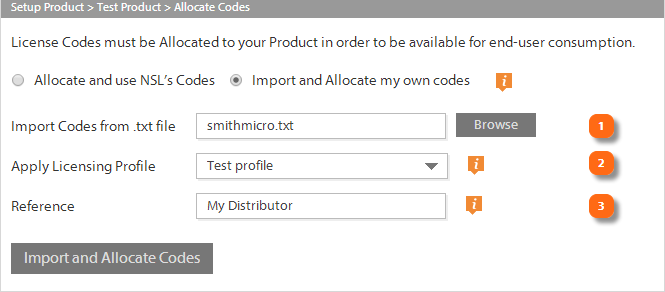
1Import codes from the text file - If you choose to use your own licenses with Zentitle then you need to import them into the system from a text file. Simply browse your local file system for the prepared text file and upload it.
Once we have imported your existing issued license codes and entitlements into our system, all, you need to do, is roll out an update to the base with your latest application with the Zentitle licensing library, you can even automatically activate the users silently (assuming they have some form of Internet access), and then you will have switched to Zentitle with little to no action on the end user - great customer service and very convenient for the customer.
Rules for imported licenses:
- Max 50 Chars
- No Spaces
- No unprintable characters such as carriage returns/line feeds
- XML Friendly only - no special chars i.e. None of these chars = < > / “ ‘
- Not a CSV file, just a simple text file, each code line by line
Example:
CODEA
CODEB
CODEC
See the attached "LCImport.txt" for an example import file.
2Apply licensing profile - Choose if you wish to add these codes to a custom or default profile (see notes about profiles above).
3Reference – you can name the batch of codes you are allocating, this helps so that after allocation you can easily track the purpose of each Allocation and easily identify this batch of License Codes if you wish to download them in a text file later (available further down the Allocate Codes page once you have Allocated them).
Downloading codes for use in your e-commerce systems (or provider)
Zentitle works with e-commerce vendors like Digital River, Fastspring and many others no problem at all.
We offer both of these methods:
- From the List - Digital Delivery App will store a list of the valid license and will issue them one at a time as purchases are made. See details below on Licenses from List
- From URL - Digital Delivery App will fetch licenses from your server or another URL. See details below on Licenses from URL
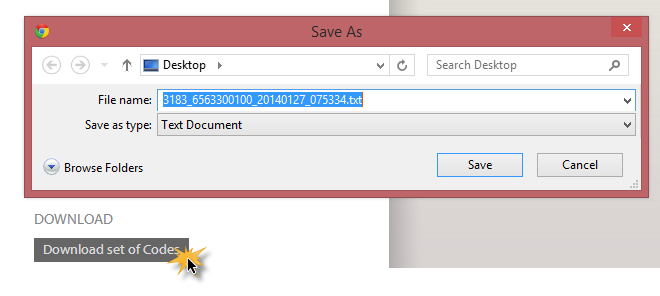
Once you have allocated your codes you may wish to download the codes themselves as a text file for distribution with your products. To do this, navigate to the “Code control and Allocation” screen and click the “License codes” button.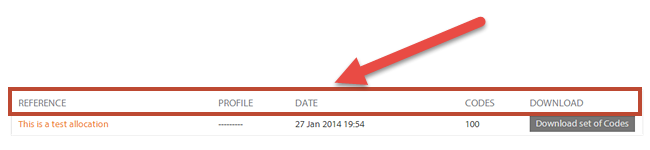
Under the main options on the page for "allocating codes" you will get a list of the previous "allocation" task you completed as a list in date order. You can use this list as a reference as to download the license codes in batches for distribution to your users or e-commerce system/provider.
The list has these options:
- REFERENCE - this is the name you gave the allocation transaction above.
- PROFILE - this is the name of the profile you chose to allocate the codes against.
- DATE - the date of the allocation.
- CODES - the number of codes allocated.
- DOWNLOAD - the button to download the codes in a text file for distribution. Clicking the button shows the dialog below where you can save the file to your local file system.
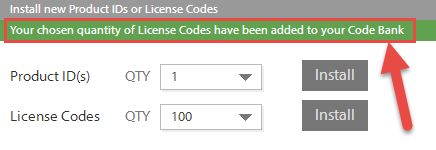
Putting codes into your "Code Bank"
Zentitle breaks down its paradigm into "products" (or ProductIDs) and licenses for distribution to the end user (license codes).
If you have an unlimited account you can self-serve these items as required.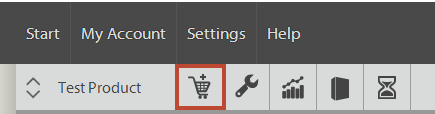
- Click on the "cart" icon on the product toolbar to get started.
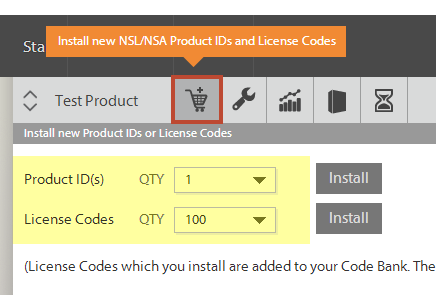
- Then, just click on the ProductIDs or License Codes drop-down dialog boxes and add either in the volume required for your project.
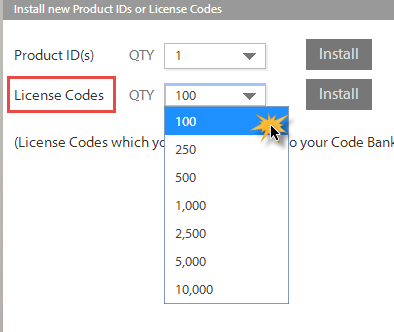
Once you have added products or codes, they will show up in the "Product Toolbar" for the user within your licensing projects.
Adding license codes this way is referred too in the other docs as "adding them to the code bank".