Introduction:
Zentitle not only allows you to organize and control your products using a basic "product" paradigm but also allows you to break that concept down further with the use of license code "profiles". In the first instance a "product" defines the entitlements across all the licenses for that product, when you allocate codes to a product they all then adopt those rules when distributed to a user for "activation".
However, sometimes that product requires differing ways to distribute, sell or control it when the product is being deployed and "profiles" allows for the segmentation of the product into these various differing requirements.
Think of profiles as “folders” and license codes as files in the folders. The folder defines the “files” license parameters when first placed in the folder. But the file can change at a later point due to end users updating the files. Codes can be moved between profiles if they have not been used.
Later on you might choose to change (edit) a Profile’s license parameters, at the point of ‘saving’ these changes you can select whether or not these updated parameters are to be inherited by any License Codes that already belong to the Profile.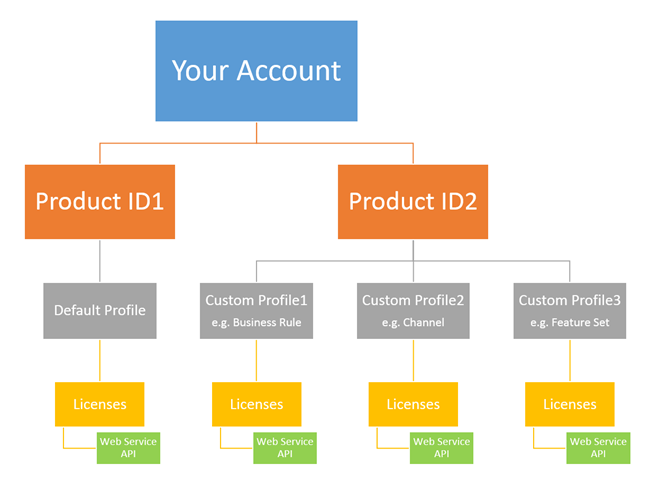
Profiles are sub-sets of the product paradigm. The red arrow is the product name and the blue arrow the profile name for that product.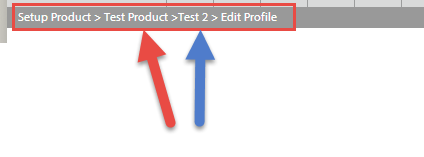
Profile use cases
Example uses for profiles are to describe channels (e.g. I want to sell this product to 2 distributors but each has different rights on the licenses I provide to them, therefore I make 2 profiles, one for each distributor); packages of features or functionality (e.g. I wish to sell this product as a standard and pro version, therefore I make 2 profiles, one for each bundle of features) or sets of business rules (e.g. I wish to sell one group a subscription and another group a perpetual license, therefore I make 2 profiles, one for each business model).
Indeed, you can use a profile for any of the core ways you setup the main product license entitlements, excluding trials, and then segment these options, and this then allows you to target differing options to groups of users in a simple and easy way.
You can the distribute these groups of codes via a web service or download them as batch text files - this then allows you to setup many SKUs or product sets in a logical way and then easily attach them to business processes such as a web store that sells many versions of your product, or to channels or to various sales team etc.
Each profile applies to a specific Product in the system. You can create a range of profiles to help you manage the codes in the system and to sub-divide a product's allocated codes into groups with different license rights. You may setup profiles in advance and then use them in the code allocation process.
Creating custom profiles
To get started please ensure you have the credentials to hand you got sent with your trial or account purchase and proceed as below.
1 Login to my.nalpeiron.com
2 Select the product you wish to edit from the product toolbar.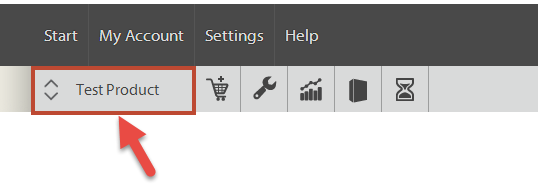
3Click the Configure drop-down menu, then select "code profiles".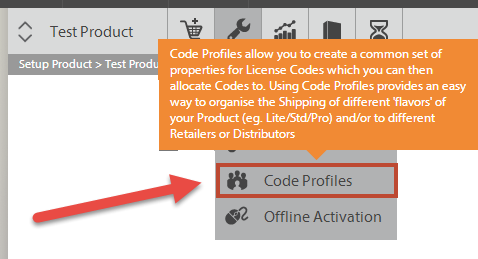
4Click "create a new profile"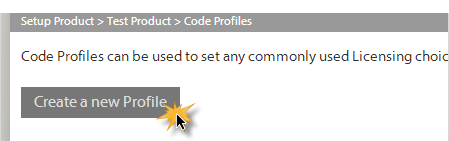
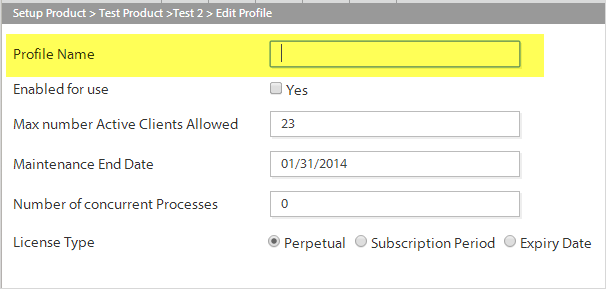
5Carefully name the profile so you know what you plan to use it for later. Make it descriptive as you will need to select it in a later step within the UI.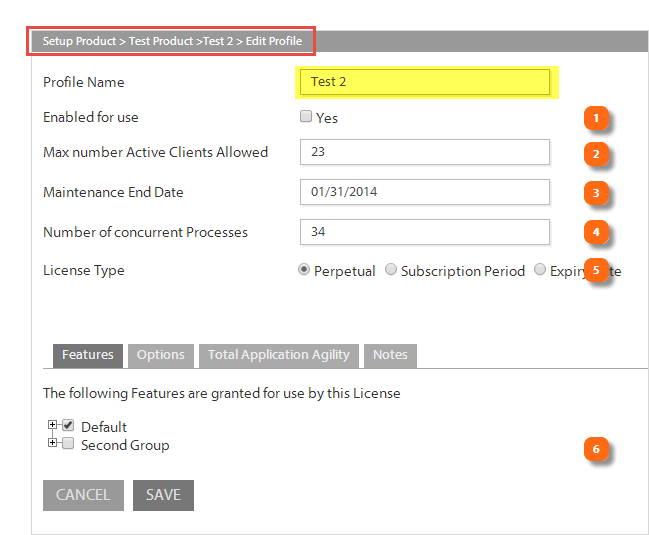
Now choose the options for this custom profile:
1 Set if this profile is enabled or not.
2 Set the no. of active clients allowed (installations allowed) per license code (or activations per code). This is important and is usually set to 1 or 2 to limit the usage of the license. Max no. is 50000.
3 If you have any form of "maintenance contract end date" associated with this license type enter that next.
4 Set the number of concurrent "processes" to control remote desktop/citrix type access. You can restrict the number of users that can "remotely" access the application with this parameter, it's an important method to control over use in some environments.
5 Choose your business model for this "product" (you can have multiple models and products)
If you choose a "subscription" based model you get the option to set the period that the license will lapse until reset (i.e. a user pays when the period recurs).
6 If you need to set other options in the advanced tabs then do so as required.
For a reminder of the full details on all the options please review the topic: "Setup your products" (opens a window).
Business rules and activation limits
The business rules for the NLS are defined at three levels:
1 At the product level (DLL) —the values that you set at the product license level serve as the ‘default’ for all license codes associated with the product when they use the DLL as the basis for the licenses. This default limit is set within the initial product setup but you can change it at a code level later if you choose.
2 At the license code level—the values that you set for a specific license code override any value set at the product level. This can be done ‘on-the-fly’ on a per code basis as your business model requires i.e. if you up-sell a client to more installs (activations) there is no need to issue another code but merely update their activation limit on the code already issued.
3 At the code "profile" level - In addition to allocating codes against a single ProductID and the related license rules and rights you can segment the codes under a ProductID into separate groups called “profiles”.
Depending on your organization's requirements, you may decide to adopt a strict licensing model, a lenient licensing model, or some variation of the two. Under a strict policy, an End User who wanted more activations than the set limit, say one, would need to contact your customer support staff and plead their case for being allowed to activate the product one more time. This would provide tight security, but it might lead to higher support costs. In contrast, a more lenient policy might permit each license number to be used multiple times for activating the product. This would reduce the number of support calls, but it would let unscrupulous End Users activate the product on additional machines, presenting a risk of abuse.
This is all that is required for setting up a profile. In order to use a profile, you need to "allocate license codes" to the profile.
Managing Profiles
Think of profiles as “folders” and license codes as files in the folders. The folder defines the “files” license parameters when first placed in the folder. But the file can change at a later point due to end users updating the files. Codes can be moved between profiles if they have not been used. : Once a code has activity it cannot be moved to another profile. In order to assign a license number from a profile to a customer, that profile must have license numbers in it. Therefore you must copy codes to that profile before you can assign them to the customer.
- PROFILE NAME - This is what you named the profile in the earlier step e.g. SKU name 1234
- CREATED - When you created the profile
- LAST EDITED - When you created or last changed the profile
In the profiles page, you will see the list of profiles you have created and you can manage them from here.
Click the buttons to the right of each profile to manage it. You can easily delete, copy and edit an existing profile.
Edit Profile
To do this simply click "edit" for the profile you wish to change.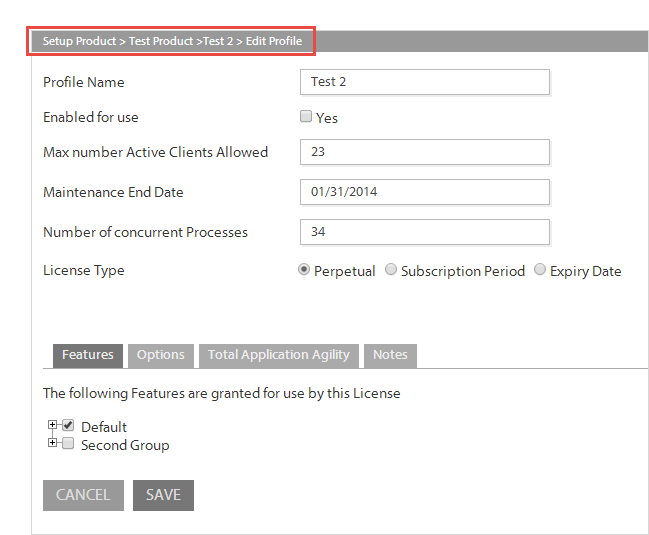
Now you can change the profiles parameters, and also the parameters for all codes assigned to it. The code update process is regulated by the check box – “Make license codes inherit profile properties?”
If this check box is checked then all the codes already allocated to the profile will be updated to the profiles parameters.
Once you have finished click on “save” to complete the changes.
You will be advised when the codes associated with the profile have been successfully updated in the toolbar.
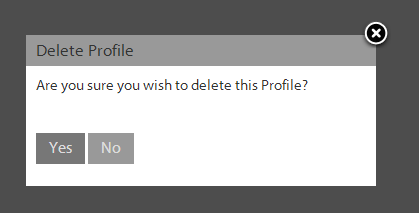
Delete Profile
This will delete the profile selected and return all codes in the profile to the default profile keeping the parameters they have, this will happen to all codes whether they have activity or not.
Duplicate Profile
This option will copy the selected profile to create a new profile. No codes will be copied to the new profile but it will have the same parameters as the source profile. You will be prompted to save this under a new name, then you can keep or modify the previous parameters.
Moving license codes between profiles
There are two ways you can move license codes between profiles (and also decide if you want the properties to be inherited).
In order to learn more about how to manage license codes See this topic for how to manage license codes
For a single code
Simply make the change in the "code edit" page.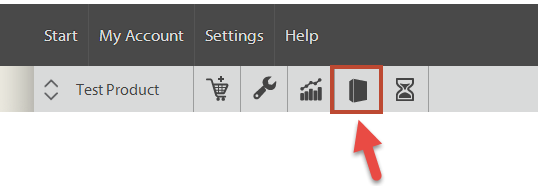
1Navigate to the license code management toolbar

2Then find the code in the list and "edit" it.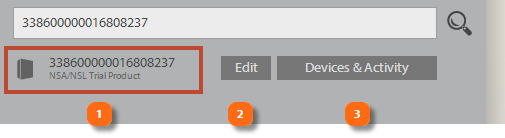
3Or simply search for the code and edit it.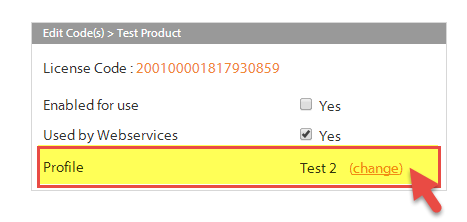
4Find the "profile" line on the code edit page and then click the "change" link next to the existing profile.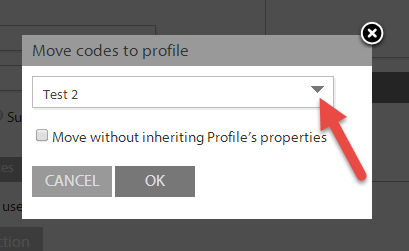
5Choose the new profile, then choose if you wish to inherit the new profile parameters for this code or not (select the check box) and click "OK".
To manage multiple license codes
There are two ways to manage multiple license codes, using the bulk control function on the "manage codes" page or by using the "move codes" page.
Bulk Control
The "manage codes" page is accessed from the gray toolbar as shown below:.
2Now you need to switch on "bulk code control" by navigating to the bottom of the codes page.
3Now switch on the controls by clicking the switch on the right to "on".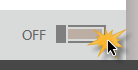
4With the option to select the codes that you wish to move, select these.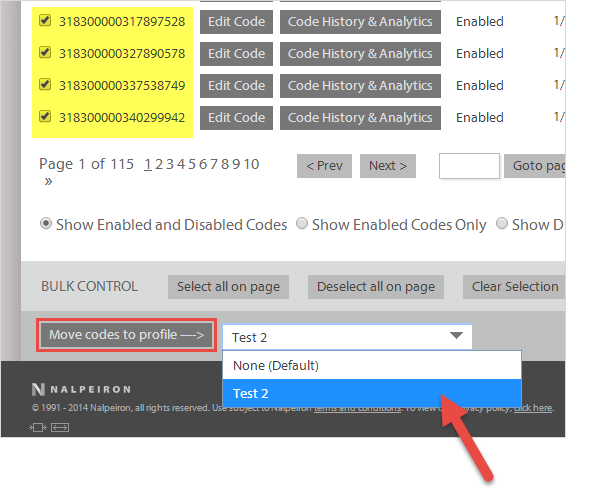
5Then choose from the dropdown menu at the bottom of the page and select the new profile. Then click the button "move code to profile".
6Finally choose if you wish to inherit the new profile parameters for this code or not (select the check box) and click "OK".
Move Codes
On the Move Codes page, shown below, you can move unused codes (i.e. codes which have not been activated and which are not used by web services) from one profile and/or company to another.
Simply select the source and target profiles/companies and enter the number of codes you wish to move.