
Logging in as the Admin User
When you have End-User Portal functionality enabled on your Zentitle account, you will have an Admin user account enabled. The username is simply "Admin" (case-insensitive) with password "123qwe". This should be changed on first login.
Once logged in, you will see the Administration menu on the left hand pane with the items 'Licenses' and 'Settings'. The right hand pane defaults to the first of these. We shall describe these in turn.
NOTE: After changing your Admin password, the next thing you should do when first logging in as Admin is to enter your webservices credentials. This is required to enable most of the functionality of the End-User Portal. Please ensure that you have created these and then scroll down to the 'Zentitle' section of the current document for instructions for setting them in the Portal.
Licenses
You initial Licenses page will resemble that shown below:
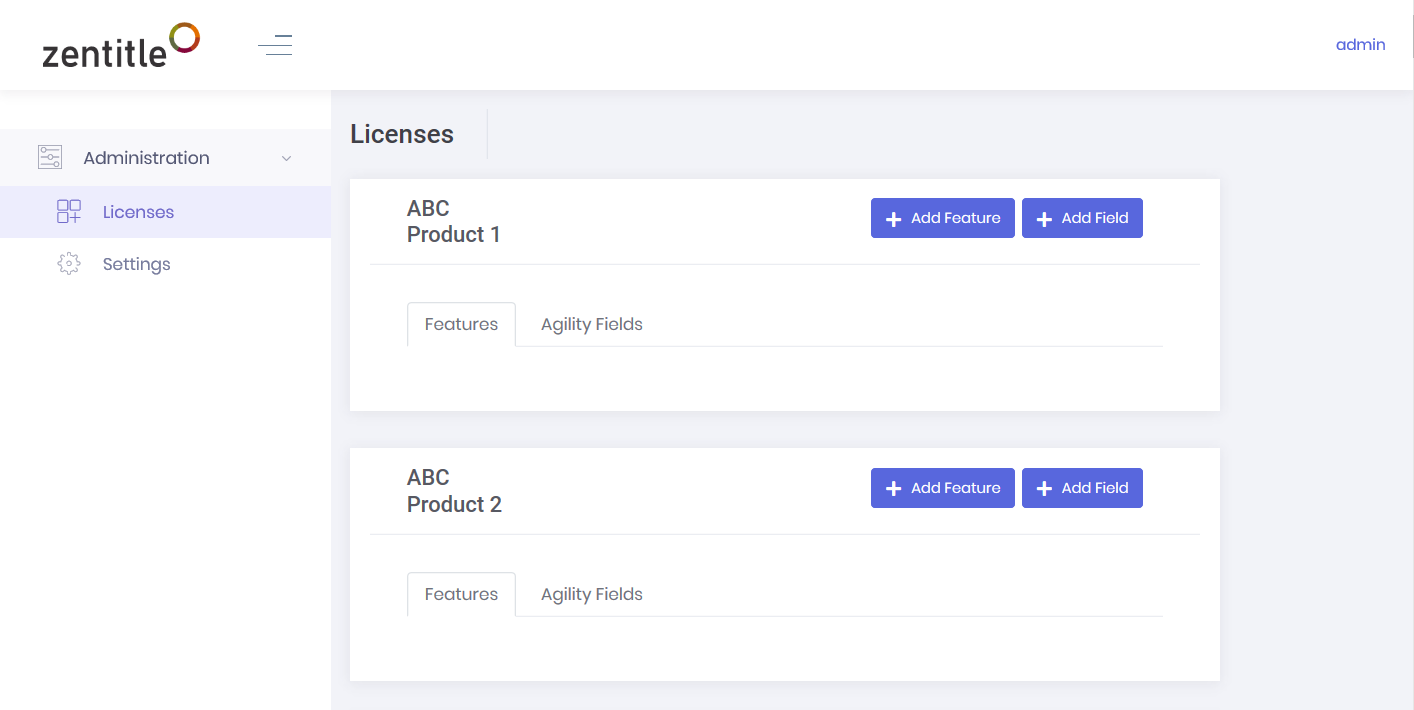
This gives a list of your products and there are two tabs for each product: 'Features' and 'Agility Fields'.
These tabs are initially blank. The purpose of these is to enable you to add pre-existing features and/or application agility fields to your users' UI which they will then see when managing their license codes.
To add a feature, click the 'Add Feature' button. Now you will be presented with the Feature Editor popup form:
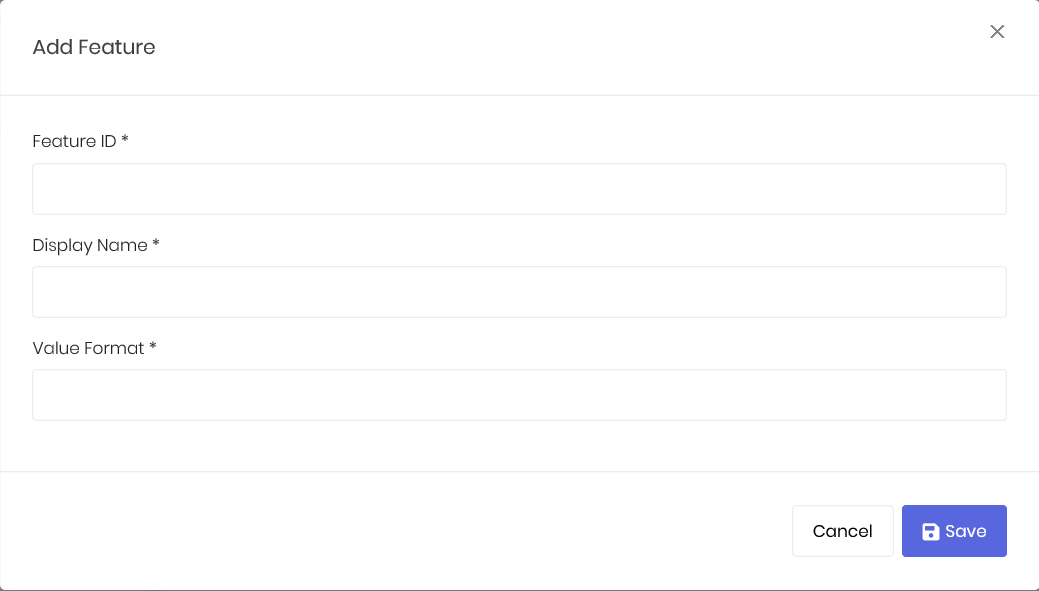
You should enter the 5-character Feature ID and choose a display name. You should also enter the 'ValueFormat' string. This should either be left blank (for 'normal' features) or be of the form '{attr1} of {attr2}' where the attributes attr1 and attr2 should take the following values depending on feature type:
| Feature Type | attr1 | attr2 |
| Floating Feature | TotalActive | MaximumActive |
| Element Pool | ElementCount | ElementLimit |
| Consumption Token | TokenCount |
TokenLimit |
For example, in the case of a floating feature, you would set the ValueFormat string to '{TotalActive} of {MaximumActive}', in which case you will see an entry similar to that below added to the table:
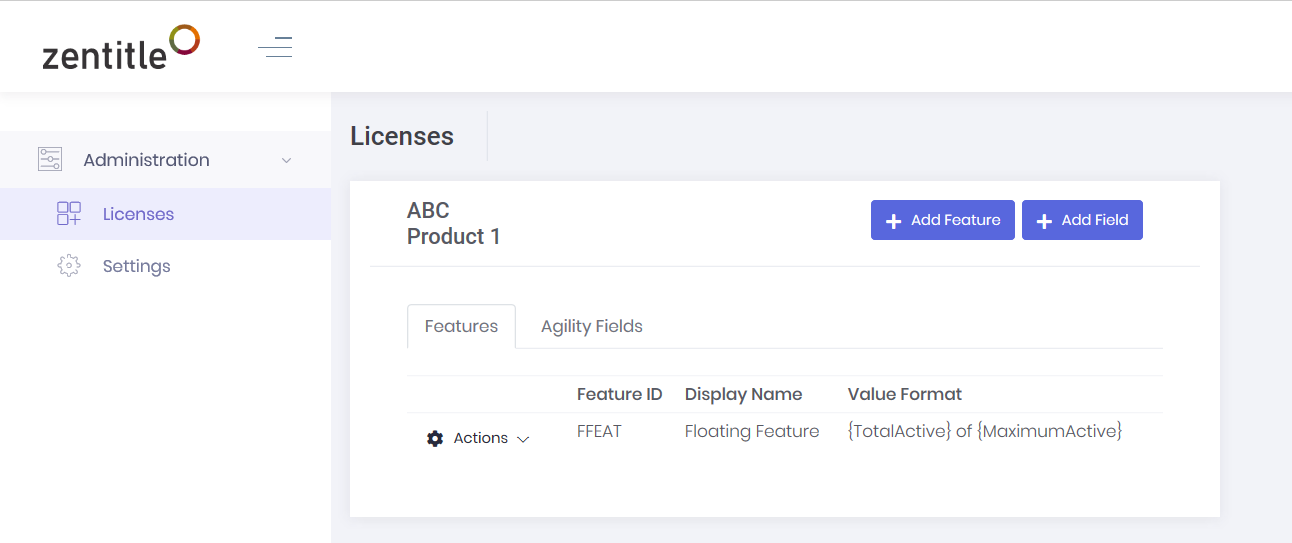
To add an agility field, click the 'Add Field' button. You will be presented with the AA Field Editor popup form:
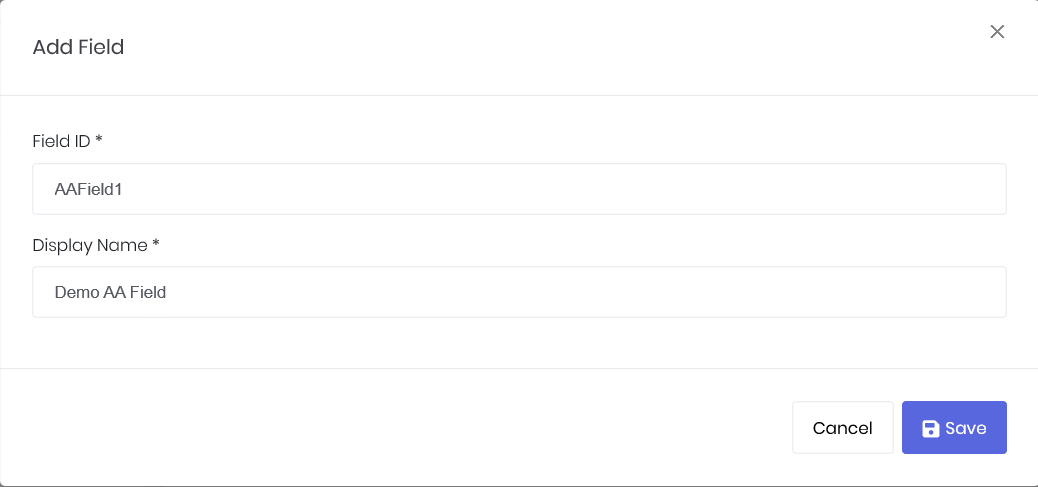
You should first enter the Field ID, which is the name you gave the field when defining it on the Zentitle dashboard. You should also enter a display name which is how the field will appear to your users. You will then see this data added to the table:
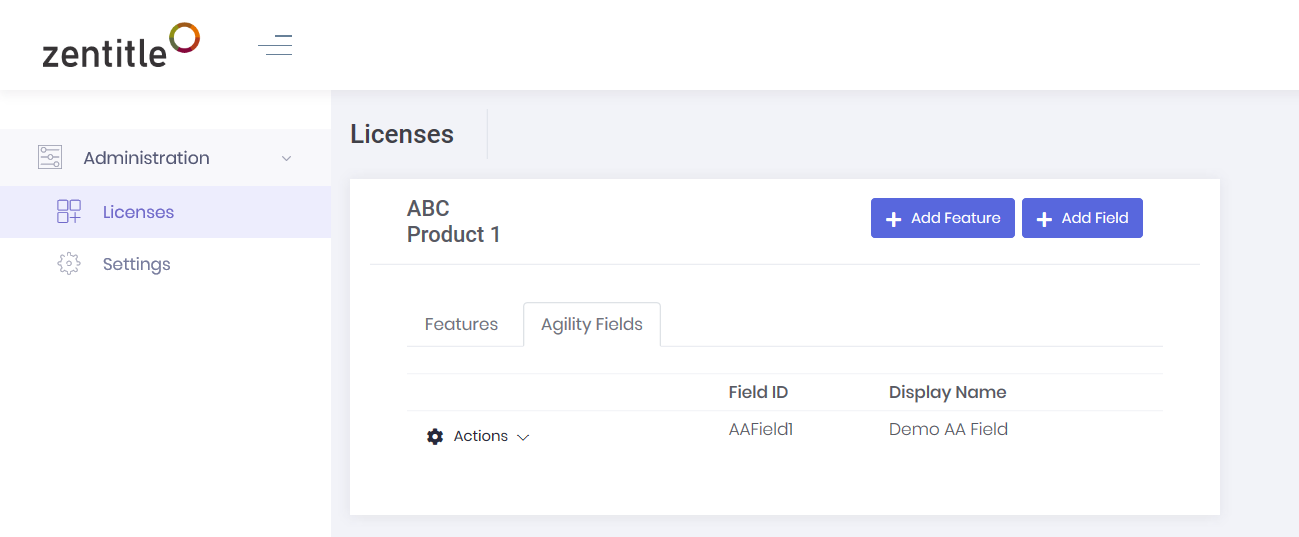
The 'Actions' dropdown contains items enabling you to edit this entry, as above, or delete it.
See the Master or Standard Users document for how these will appear to your end-users.
Settings
This menu item enables you to tailor various visual properties of the End-User Portal to your requirements. There are five tabs on this page:
- Appearance: Options to customize the appearance of your EUP to match your corporate/product branding.
- Security: Set various security options for login credentials.
- Zentitle: Set configuration and display options/permissions.
- Email (SMTP): Email server configuration.
- Email Template: Template for emails triggered by certain portal events.
Appearance
Here, you can upload your corporate logo. This will replace the Zentitle logo at the top left corner of the page. It should be a JPG/JPEG/PNG/GIF file with a maximum of 30KB size and 139x35 pixel dimensions.
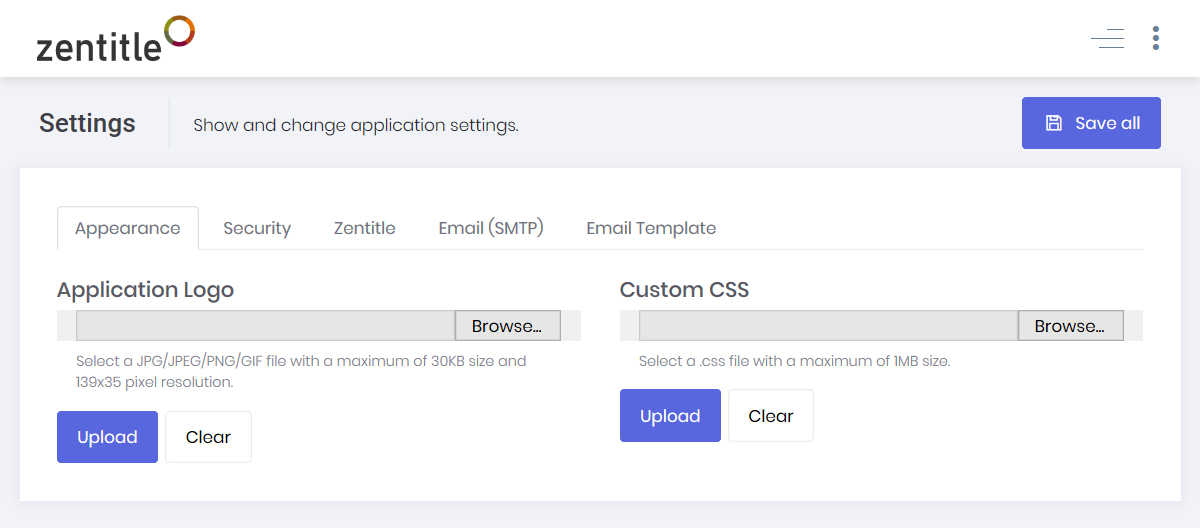
You can also upload a custom CSS file to further modify the portal's appearance in accordance with your corporate/product branding.
Security
On this tab, there are various options pertaining to required password format and system behaviour on failed login.
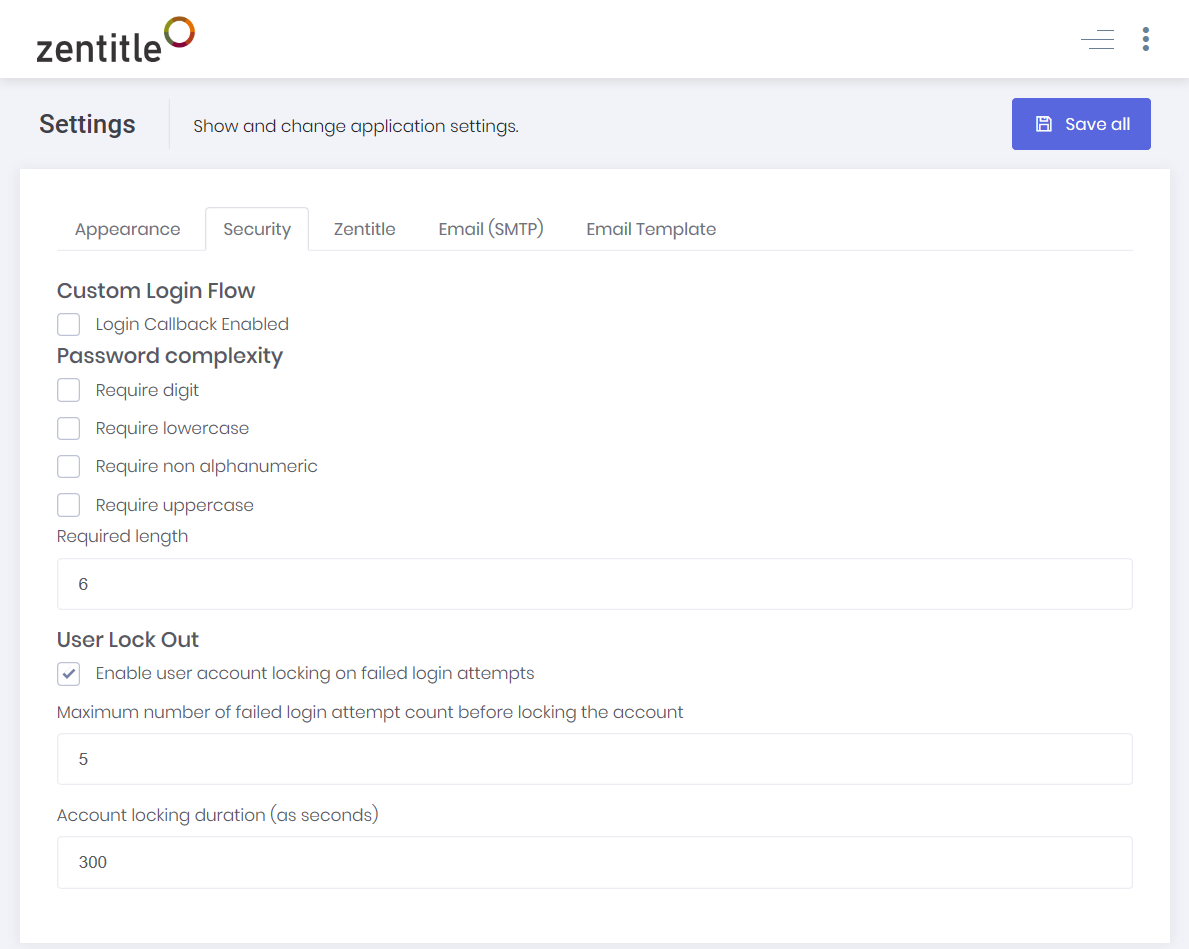
This page is divided into the following sections:
- Custom Login Flow: If you are using third-party authentication, as described in the Account-Based Licensing documentation, you should check 'Login Callback Enabled'. User authentication on the EUP will then take place on the same authentication server as is used to authenticate their credentials for your software application.
- Password Complexity: Here there are various options to set the required form and length of the login password.
- User Lock Out: Gives customisation options for locking a user out after failed login attempts.
If you check 'Login Callback Enabled' (which you should do if you are using account-based licensing with third-party authentication) then you will be required to enter the Login Callback URL and the Login Callback Secret as shown:
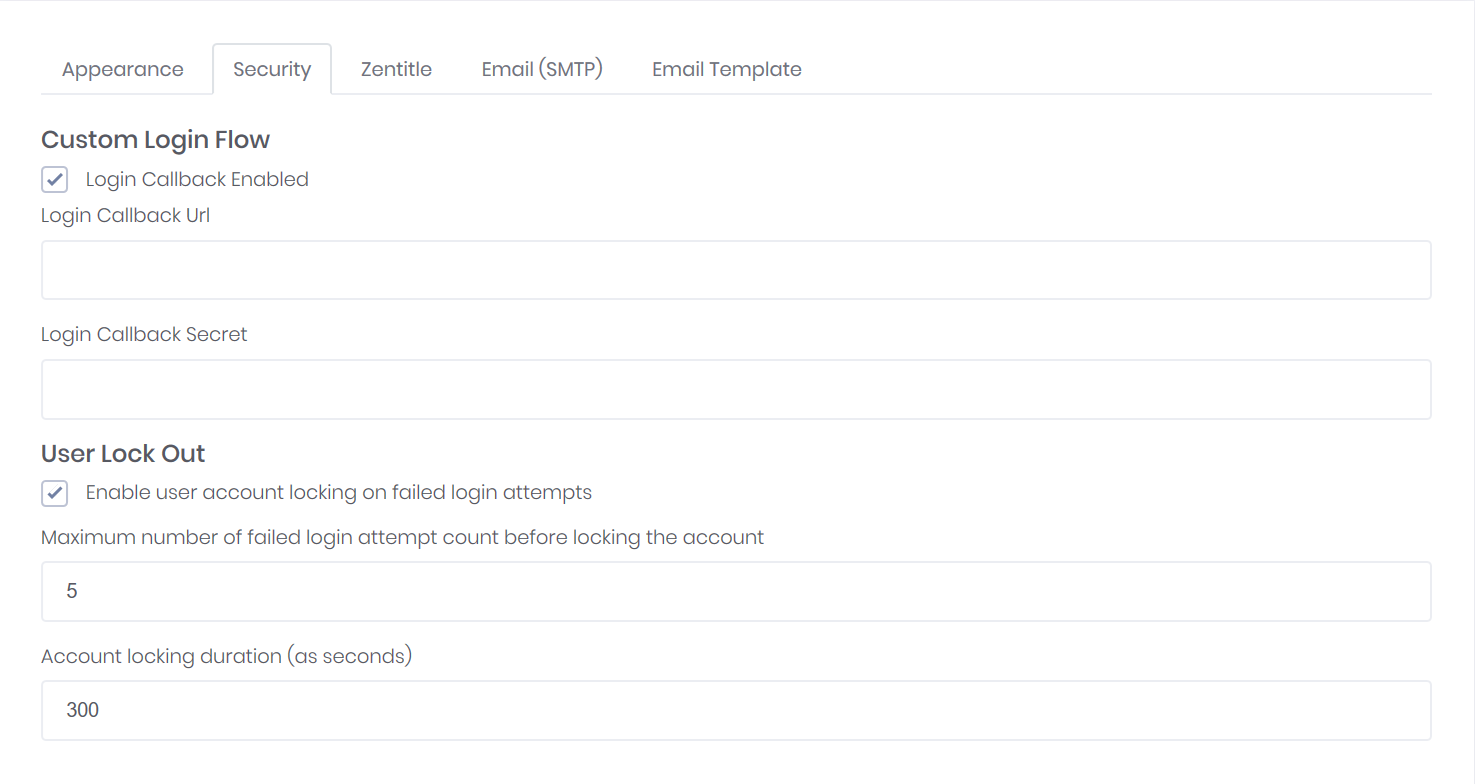
Login Callback URL: This is the endpoint on your authentication server against which the EUP credentials
Login Callback Secret: This is a cryptographic key used to encrypt user credentials sent from the EUP to your authentication server.
The credentials are sent from the EUP to the authentication server as a JSON Web Token. These are encrypted and integrity verified using AES256+HS512 and digitally-signed using PBES2-HS256+A128KW . The encryption is symmetric and the callback secret is the encryption/decryption key.
The following C# example (which uses the 'jose-jwt' NuGet package) shows how the decryption may be carried out on the authentication server. Here, the string _loginSecret is the callback secret. It will return the result "OK" if the decryption is successful and "Err" if not. This code should be modified to include the authentication routine whereupon it only returns "OK" if both decryption and authentication are successful.
C# Example
using Jose;
using Microsoft.AspNetCore.Mvc;

namespace EUPLoginCallbackHandler
{
    public class LoginCallbackResponseModel
    {
        public LoginCallbackResponseModel(string result)
        {
            LoginResult = result;
        }
        public string LoginResult { get; set; }
    }

    public class LoginTokenModel
    {
        public string Username { get; set; }
        public string Password { get; set; }
    }

    [Route("login")]
    public class LoginController : Controller
    {
        private readonly string _loginSecret = "MyTopSecretSecret";

        [HttpPost]
        [Route("auth")]
        public LoginCallbackResponseModel DoAuthenticate([FromForm] string token)
        {
            var model = JWT.Decode<LoginTokenModel>(token, _loginSecret, JweAlgorithm.PBES2_HS256_A128KW, JweEncryption.A256CBC_HS512);
            return model.Username == "username" && model.Password == "password"
                ? new LoginCallbackResponseModel("OK")
                : new LoginCallbackResponseModel("Err");
        }
    }
}
Note: third-party authentication is only an option for end-user accounts. The ISV admin account is always authenticated by Zentitle.
Zentitle
The purpose of this page is to enable you to configure settings for your Zentitle account. These settings are your Zentitle Customer ID, your webservices credentials and an application name.
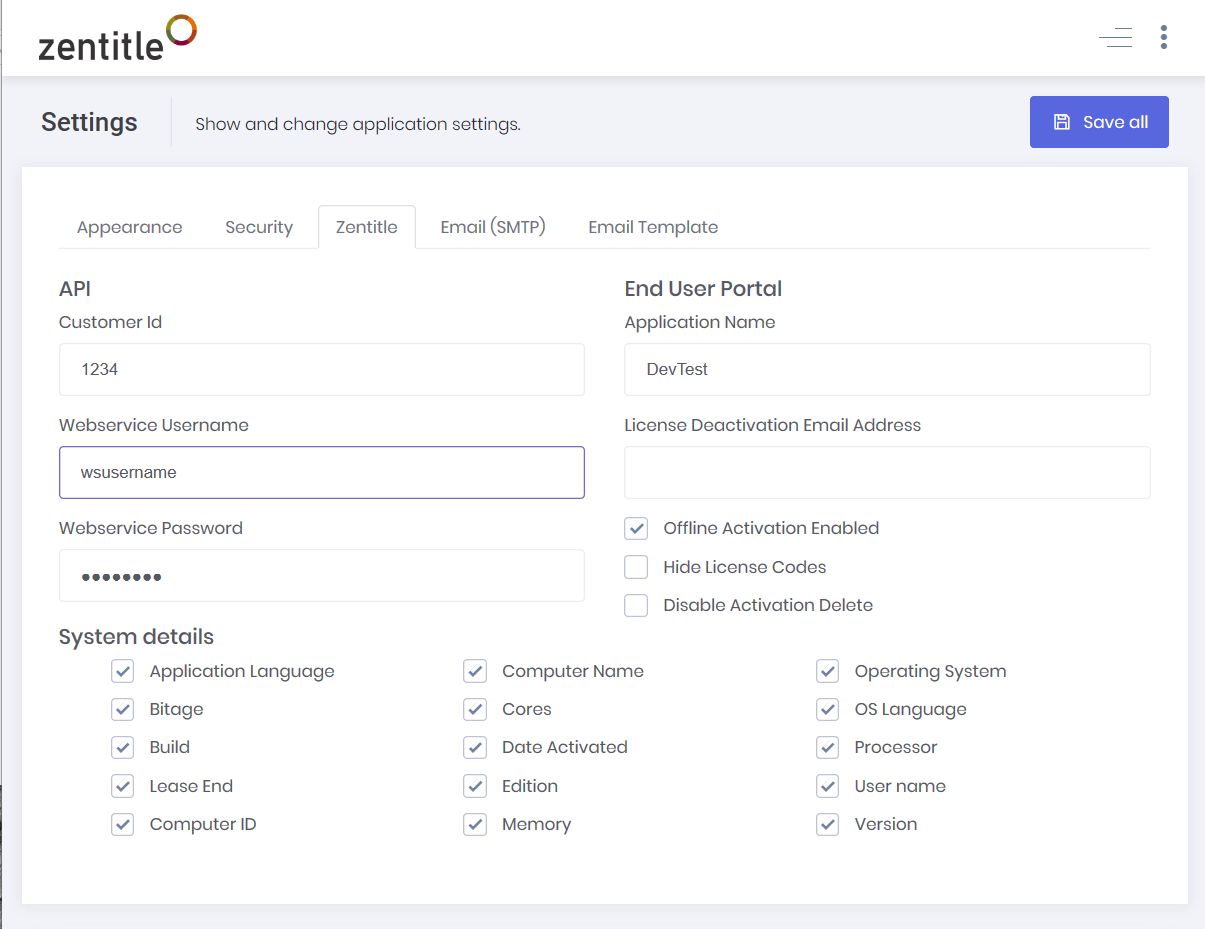
As shown above, the various options on this page are partitioned into three sections:
- API: The end-user portal communicates with the Zentitle Licensing server using our SOAP webservices. As such, you are required to setup your webservices credentials on the Zentitle dashboard and pass them in here to the end-user portal, along with your Customer ID.
Note: whenever you change your webservices credentials on the Zentitle dashboard, you must update them here.
- End-User Portal: This section contains various configuration options. These include the Application Name, which is an overall name for your suite of products serviced by the portal, and a License Deactivation Email Address, to which an email will be sent whenever an activation is deleted on the portal. There are also options to enable/disable offline activation, hiding of license codes and deletion of activations.
- System Details: This section allows you to select which system parameters are to be displayed on the portal. Note that these are the parameters collected by the NSASysInfo analytics call, and so Analytics will have to be enabled and Privacy set to 'off' for this data to be collected. Please consult the Analytics documentation for further details.
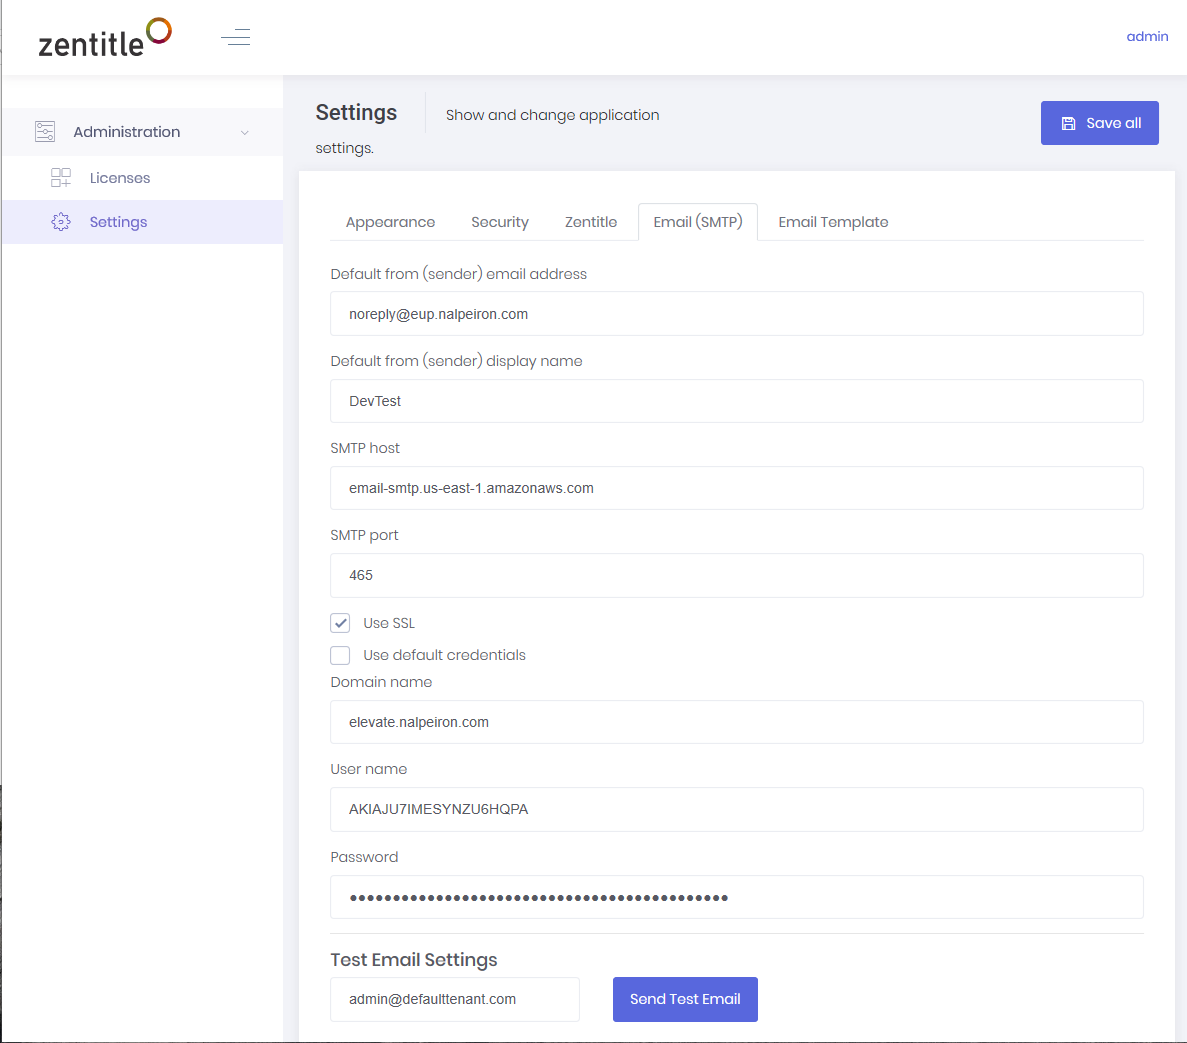
Email (SMTP)
Here you can configure an SMTP server for sending emails to your customers by supplying the values to standard settings.
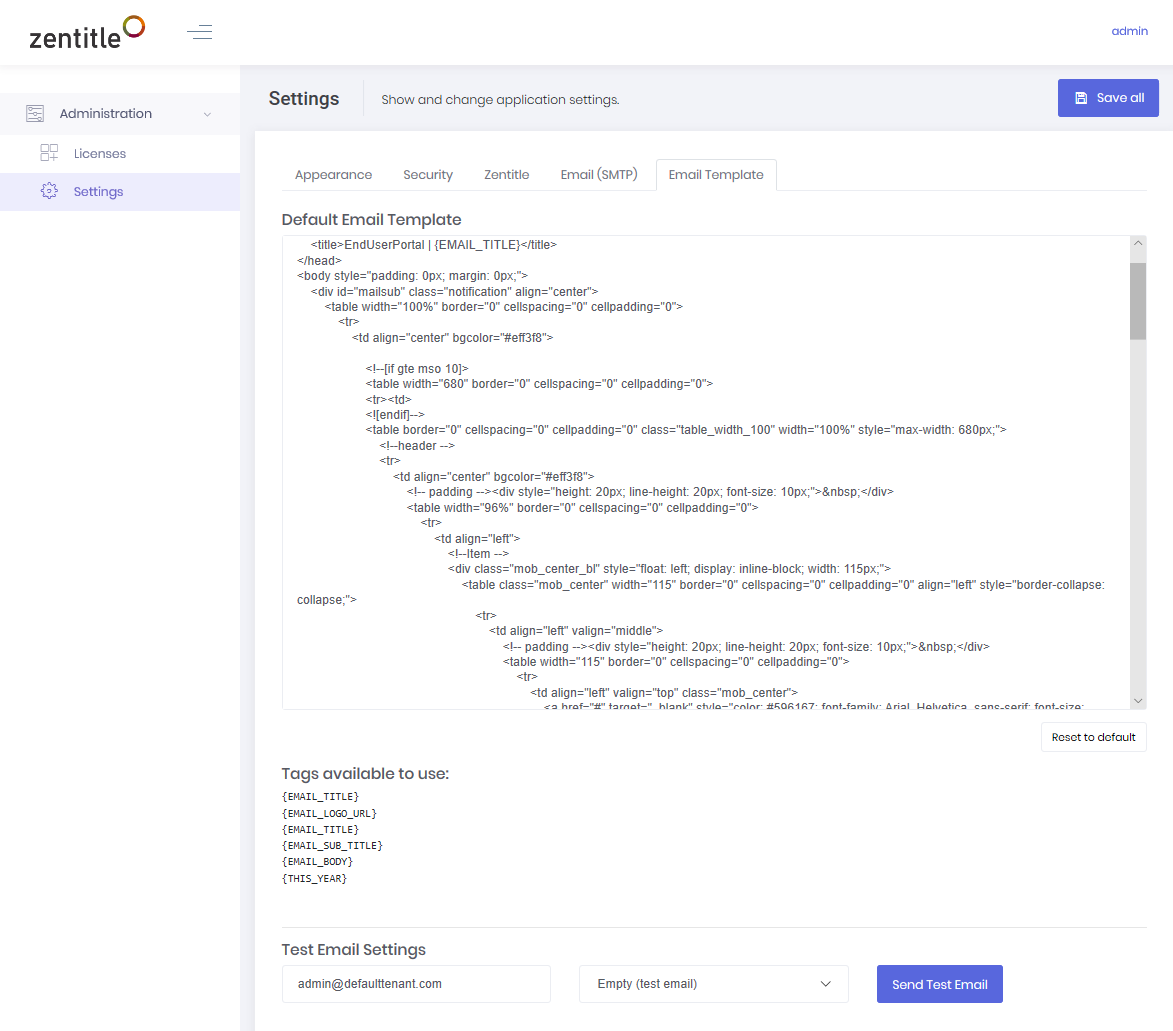
Email Template
Here you can set the templates for, and send test emails, for the following pre-defined email types that are automatically sent when the following events take place:
- Email activation
- Password Reset
- Activation Deleted
Customizing the EUP URL (purchased customers only)
You may wish to associate the EUP with a custom URL which is in keeping with your corporate identity. This is entirely achievable through a simple DNS redirection. We offer this facility to our customers who have purchased (i.e. are not trialling) the EUP functionality. The instructions for setting this up are as follows:
- Register a domain.
- Create a subdomain on this domain from which you would like to redirect to the EUP.
- Open a support ticket or contact your account manager. Request the redirection and supply the subdomain name.
- We will send you a DNS record to add to your DNS server which will validate your ownership of the subdomain. This will then give us the authority to auto-generate an SSL certificate for this subdomain to be used in the redirection.
- Please let us know when this has been added. This will complete the validation stage.
- Once this has been validated, we will generate and apply the SSL certificate.
- We will send you the DNS record for the redirection for you to add to your DNS server. Application of this record will complete the setup of the redirection.