Licensing Integration
and
Analytics Integration
Introduction
This article shows you how to use a Java graphical example project, created and designed to be run within the Eclipse IDE, as the basis for adding Zentitle Licensing to your own Java application.
Before following this documentation, please be sure to first read sections Introduction which provides important details relating to integration. You may also want to review section Avoiding Potential Pitfalls - NSL. You should also create and download your custom Licensing/Analytics DLL.
This is a simple way to use NSL in a cross-platform Java application with a graphical user interface using the popular Eclipse IDE and the WindowBuilder Pro GUI designer. Both of these third-party tools are free and download/installation instructions are given below.
Getting Started with Eclipse
Eclipse is a fully-featured, popular and well-supported
IDE for Java application development. With appropriate plug-ins, it is well-suited to the development of Java applications with a GUI. Eclipse is available for most common computer operating systems. Here we will go through the steps required to install and correctly configure Eclipse for our purposes. For definiteness, we assume an installation on Microsoft Windows x86. Some steps of the procedure may differ on other platforms.
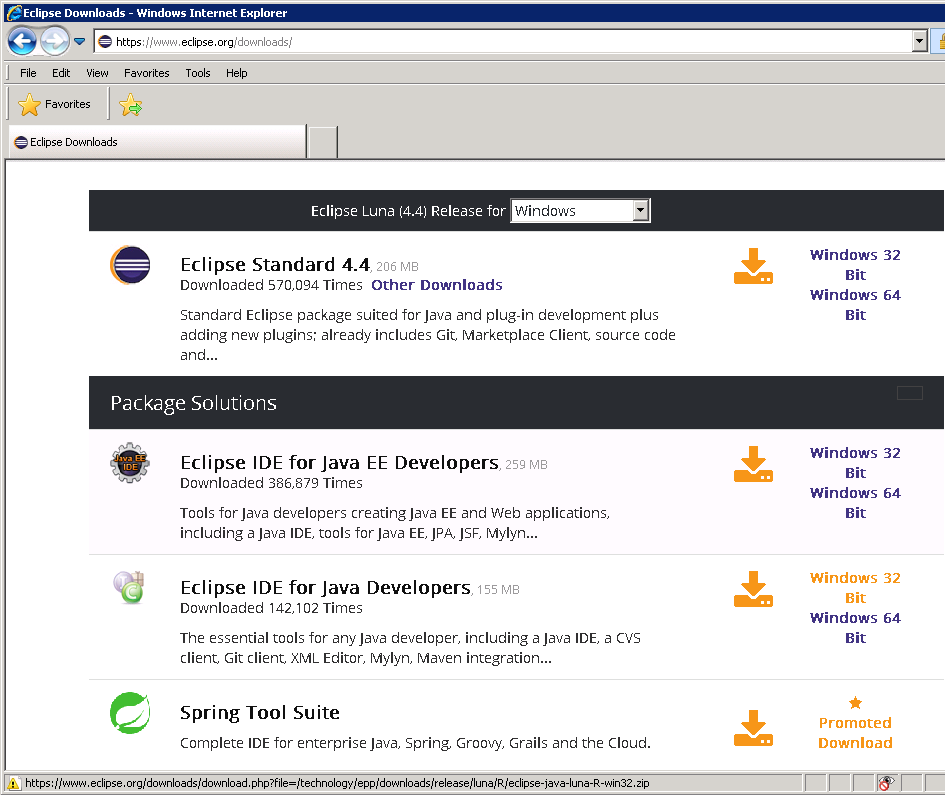
Download Eclipse for your chosen platform.
- Download the version of Eclipse IDE for Java Developers for your chosen platform.
- Install Eclipse by extracting the 'eclipse' folder and its contents to a suitable location (e.g. C:\Program Files (x86).)
- Locate eclipse.exe within the 'eclipse' folder. Run it.
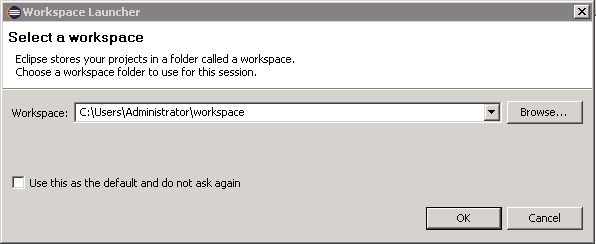
- Create a workspace folder or select an existing workspace using the dialog shown here:
Install a Java Development Kit
To enable Java development on Eclipse, a suitable Java Development Kit (JDK) must be installed. This includes a Java Runtime Environment (the Java virtual machine upon which Java applications run) together with tools for developing, debugging, and monitoring Java applications. The steps for installing the JDK are as follows:
- Obtain the JDK download (the Java Development Kit appropriate to your operating system and version of Eclipse. x86 or x64.)
- Run the JDK executable. This will present an installation wizard. Choose to install all components (see below)

- Add the $JDK\bin subfolder to the PATH environment variable.
Setup/Install a Java Runtime Environment (JRE)
- Open eclipse.exe. Go to menu Window->Preferences.
- On the tree in the left pane of the Preferences form, select Java->Installed JREs.
- Ensure that the JRE (Java Runtime Environment) at $JDK has been installed. Otherwise, install it by clicking Add.
- On the next dialog, select Standard VM.
- Click Next.
- On the subsequent dialog, enter the $JDK location in the JRE Home textbox and click Finish.
Installing WindowBuilder Pro
WindowBuilder Pro is an Eclipse plug-in that enables the creation of Java GUI applications. We use components of this, most specifically the Swing GUI widget toolkit, in the creation of the user interfaces for the Java Eclipse project.
Install WindowBuilder Pro by going to the link: http://www.eclipse.org/windowbuilder/download.php
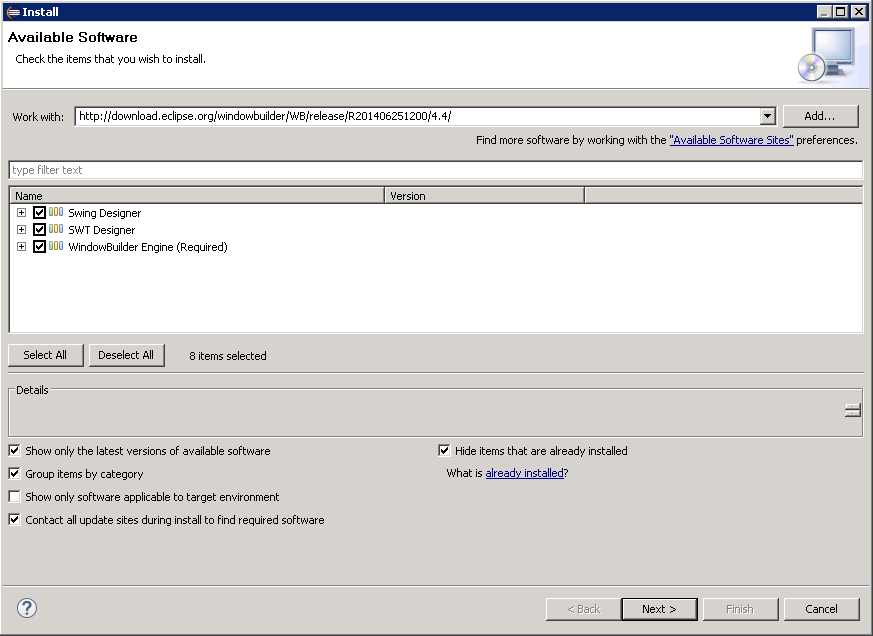
- Selecting the Release Version appropriate to your version of Eclipse and follow the subsequent instructions to Install New Software.
- Click the Select All button as shown below and click Next.
- Accept the License Agreement terms and click Finish to perform the installation.
- Restart Eclipse.
Importing the Java Eclipse Project
The Java Eclipse project depends on the Java SDK which must also be built,. All components can be built using the following instructions:
- Download the Java Eclipse project file NSLExampleJavaEclipse.zip and extract it to get the JAR file NSLExample.jar.
- Follow the build instructions for the Java SDK (this is a combined project that includes both NSA/NSL functionality.)
- Run Eclipse.
- On the Eclipse menu, click File->Import->General->Existing Projects Into Workspace and then Next.
- In the Import Projects dialog, click Select archive file, navigate to the JAR file you just saved and make the selections shown here:

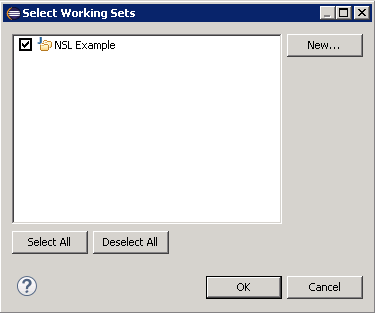
- Click Select in the Working Sets panel and select NSL Example as shown in the Select Working Sets dialog shown below.
- Click Finish.
On Eclipse, go to Window->Show View->Package Explorer to bring up the Package Explorer view.
- Right-click the NSLExampleJava\src folder and select from the context menu New->Package.
- In the New Java Package dialog, give this package the name 'Nalpeiron' and click Finish.
From the Java SDK, copy (by dragging and dropping to the Nalpeiron package icon) the following files into the com.nalpeiron.nalplibrary package:
- NALP.java
- nalpError.java
- NSA.java
- NSL.java
Copy the libraries nalpjava.dll into the folder NSLExampleJava/bin and ShaferFileChck.dll (or their equivalents in Linux/OSX - see SDK documentation) to the folder NSLExampleJava.
The project files may be viewed in the Project Explorer by clicking Window->Show View-Project Explorer in the main Eclipse menu.
Individual source code files (with the .java extension) appear in the package subfolders of NSLExampleJava\src. These may be viewed/edited by clicking them in the Project Explorer.
For those source files containing GUI-based classes, it is advisable that they are edited with the WindowBuilder editor that enables switching between Source and Design views. This may be accomplished by right-clicking on the source file icon in the Project Explorer, and, in the pop-up menu, selecting Open With->WindowBuilder Editor
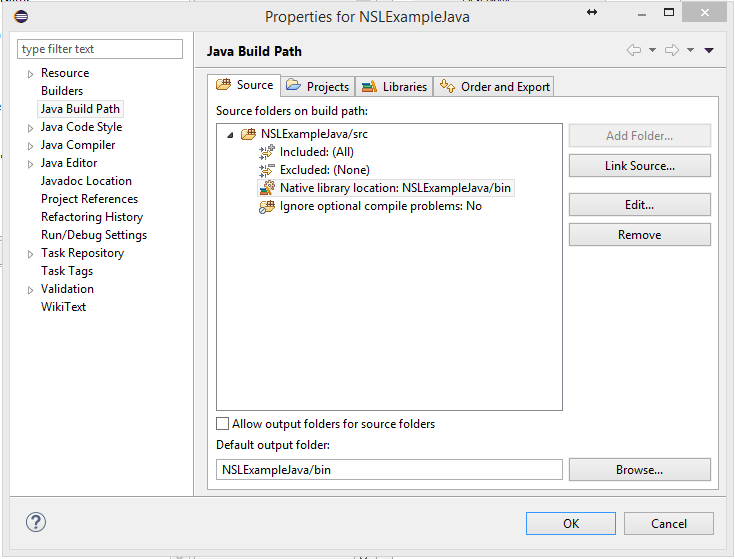
Set Your java.library.path Variable for the Project
-
Right-click NSLExampleJava in the Package Explorer.
-
Go to Build Path->Configure Build Path->Java Build-Path.
-
Click the Source tab and Expand the NSLExampleJava/src folder.
-
Select Native Library Location. Click the Edit button. Click the Workspace button. Navigate to the folder NSLExampleJava/bin.
The installation and configuration of the Java Eclipse project are now complete.
Code Integration Walkthrough
1. Create your Public Class
Within your Form Load or Application Initialize Event, add code to call the following functions located in the Shafer.cs (oShafer Object) class:
2. Call your Initialise Method
3. Retrieve and Check the License Status
The ShowError function performs the frequently-needed task of obtaining the error message from the error code passed in. There is a second, Boolean parameter passed to this function whose purpose is to specify whether or not the application should exit.
4. Additional Security Checks
Then Add security code to check the License Status, if the License status shows the client computer has been backdated then show a message and exit application.
This will give the user the prompt to correct their computer's date and time, before running the application again:
5. Retrieve License from Server
If a negative value or 0 then the client will need to attempt to get a refreshed license from the activation server via the function GetLicenseFromServer(), which defined and explained in step 7):
6. Get the License Information
- License Type: e.g. whether the license is trial or activation (with a license code), subscription or perpetual, node-locked or concurrent.
- Activation Type: e.g. whether the license was activated on or offline.
The ShowLicenseStatus method shows how to obtain the license information with calls to Shafer methods ShaferNSLGetActivationType and ShaferNSLGetLicenseType.
7. Setup your application to check the license status at regular intervals whilst running
The local Client License is only valid for the set Client Lease period for the trial or for the activated License code.
When the client Lease has expired the client is required to retrieve a new license from the server.
This allows the client to expire (subscription or trial) during the applications execution, instead of just at application start
Then add the timer handler to call the following code, to check the license status and retrieve new license if required
8. Setup your ApplicationEnd DLL closure
Please add code to the initialize method to trap the JFrame close event in order to perform some necessary tidying up on the application being closed.
The main purposes of the code in this method are to ensure that the license is returned to the server if it is a concurrent license and to close the Zentitle support library. Returning the license code will make it available for use by other concurrent licensed clients.
Build, run and test your application
The project may be run/debugged by clicking the NSLExampleJava icon and selecting Run->Run or Run-Debug from the main Eclipse menu.
Exporting the Java Eclipse project
Here we describe how the Java Eclipse project may be exported for redistribution, as a guide for exporting your own applications with the correct files included.
In Eclipse, go to File->Export. In the Export dialog, select the export destination to be Java->JAR file. Make the selections shown here.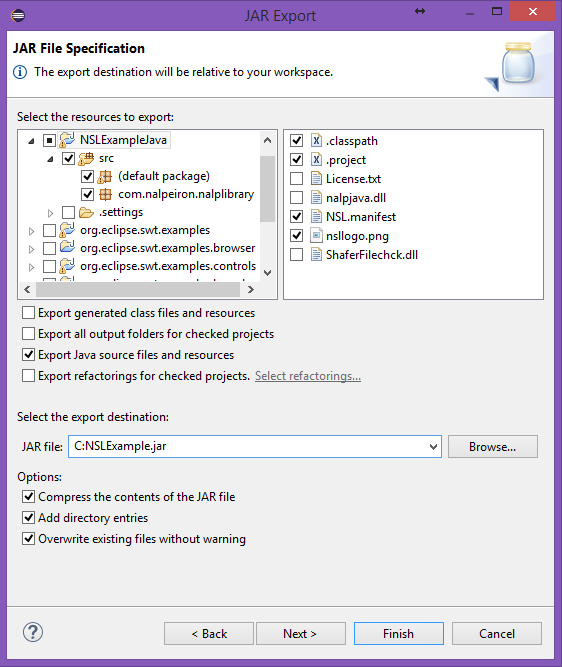
The following minimal set of files should be exported from the following folders:
NSLExampleJava:
- .classpath
- .project
- NSL.manifest
- nsllogo.png
NSLExampleJava\src (default package):
- All files
- Now call the JAR file NSLExample.jar and click Next.
- On the JAR Packaging Options dialog, check to Create a source folder structure and then click Finish.
- If the com.nalpeiron.nalplibrary package is also exported, then there will be no need to separately redistribute the Java SDK.
You have now seen how Zentitle licensing works within an example application. The next step is to examine the licensing logic of this application in more depth so that you will have a greater understanding of how to implement it within your own application.
Download the Java Example Application
You will need to download both the Java SDK and the Java Eclipse project. You can download the Java SDK from this page. The Eclipse project can be downloaded from the link below:
Release Notes (Please always check the release notes for the latest updates)