
Introduction:
In this article, we are going to explain how to test the licensing process and client/server interactions.
There are two levels of testing with Zentitle, the initial testing where we are checking that the components are working together - we did that in the previous step when adding the code to your application and we continue that here. Then there is advanced testing where we try various license use cases to ensure a real deployment will function as you are expecting.
We recommend you do one and then the other, the latter being designed for developers who are happy working at a "deeper" level with the code and system.
Within a trial, the first test is useful to show how Zentitle works and to illustrate the basic functionality. The way Zentitle Licensing works is to triangulate between your code, our library and our licensing cloud (and license codes). So testing includes ensuring all those areas are communicating together effectively.
Hardware and OS Support
- ARM (ARMv5te,ARMv7aand ARMv8a)
- Linux Kernel 3.8 or newer, Glibc 2.13 or newer
Gathering your resources
Before you get started on your testing, you need to have gone through the previous steps in our getting started guide.You should now have ready in your test setup:
- Your own licensing library.
- A test application (or your own app.) that has been edited to match the library settings (Customer/Product IDs and Constants).
- A Product Setup on the Publisher Center with license codes allocated for testing.
- A set of Zentitle License Codes to test (that have been allocated to the test product).
- An example C test project coded to the product setup above for testing.
- See the ARM example project for more details on getting this setup
- Test device (if testing on actual hardware i.e. Raspberry Pi, Beaglebone Black etc) and USB cable
-
Also, it is important to have reviewed the general docs for the Zentitle platforms and paradigm to understand the system under test.
Log a support request if you are having issues. Hopefully, you will have set up and recorded all these details, so you are clear on what you are testing e.g. 1-day trial, converted to a perpetual license by activating a test license code. Plus any other tests you wish to check out after you have the basic process done.
Note the use of the ProductID. With the ProductID, you only input the last 5 digits, excluding leading zeros, into your code i.e. 6563300100 becomes 100 and 1234567890 become 67890.
Download your code example
You can download the required sample projects and SDKs at the Customer Center.
Getting Started
Once you have your test device(s) setup and your test folder with the files required you can start the functional test process.Testing Process
The process for illustrating how the Zentitle Licensing and Analytics Service works with an ARM device will be a simple test procedure to show how a license can be enabled and disabled on the ARM OS as well as track that on the Zentitle servers.
This same test procedure can be used for other ARM devices, and they should all work in much the same way except for some changes between versions of ARM.
Any error return between 0 and -999 isn't from the library. It will be due to an invalid "security constant" values between the library you created and the sample code values you need to edit.
Testing Setup and Preparation
Get your test devices e.g. Raspberry Pi (RPi) setup and be ready to either SSH or connect storage direct to the device and have some way to view the results of the testing.
In the case of these tests we set up an HDMI connection to a monitor, attached a mouse and keyboard to USB, used a flash drive to move files back and forth to a desktop where we did the base C code edits.
When "making" the files and other edits for final testing we moved the files to the RPi, via flash drive, used LXTerminal to run commands and the text editor on RPi itself to edit the C files as required.
Testing Setup on a device
After you install the sample ARM code from Zentitle and run that you should get a simple test UI as below.
Start nsaTerm with:
./nsaTerm
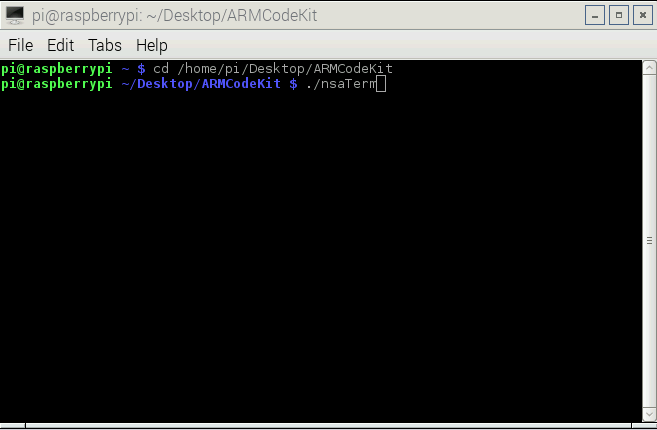
to test Analytics
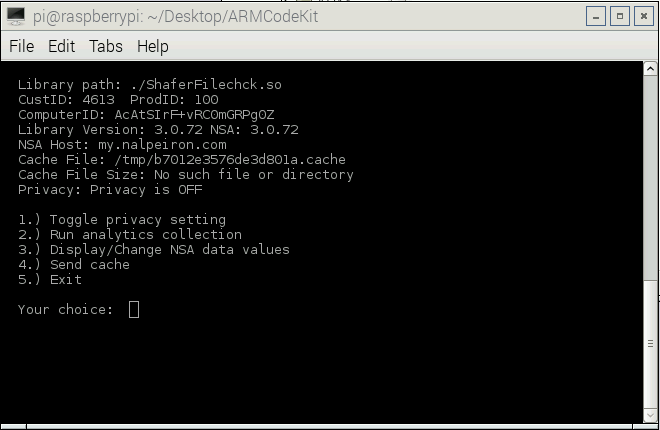
Start nslTerm with:
./nslTerm
to test Licensing
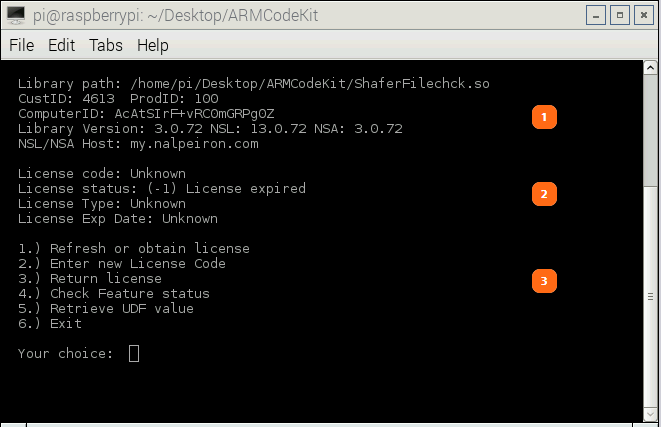
Testing process
In the UI provided by the sample code, you will now review various "license status" return numbers, their meanings are below.
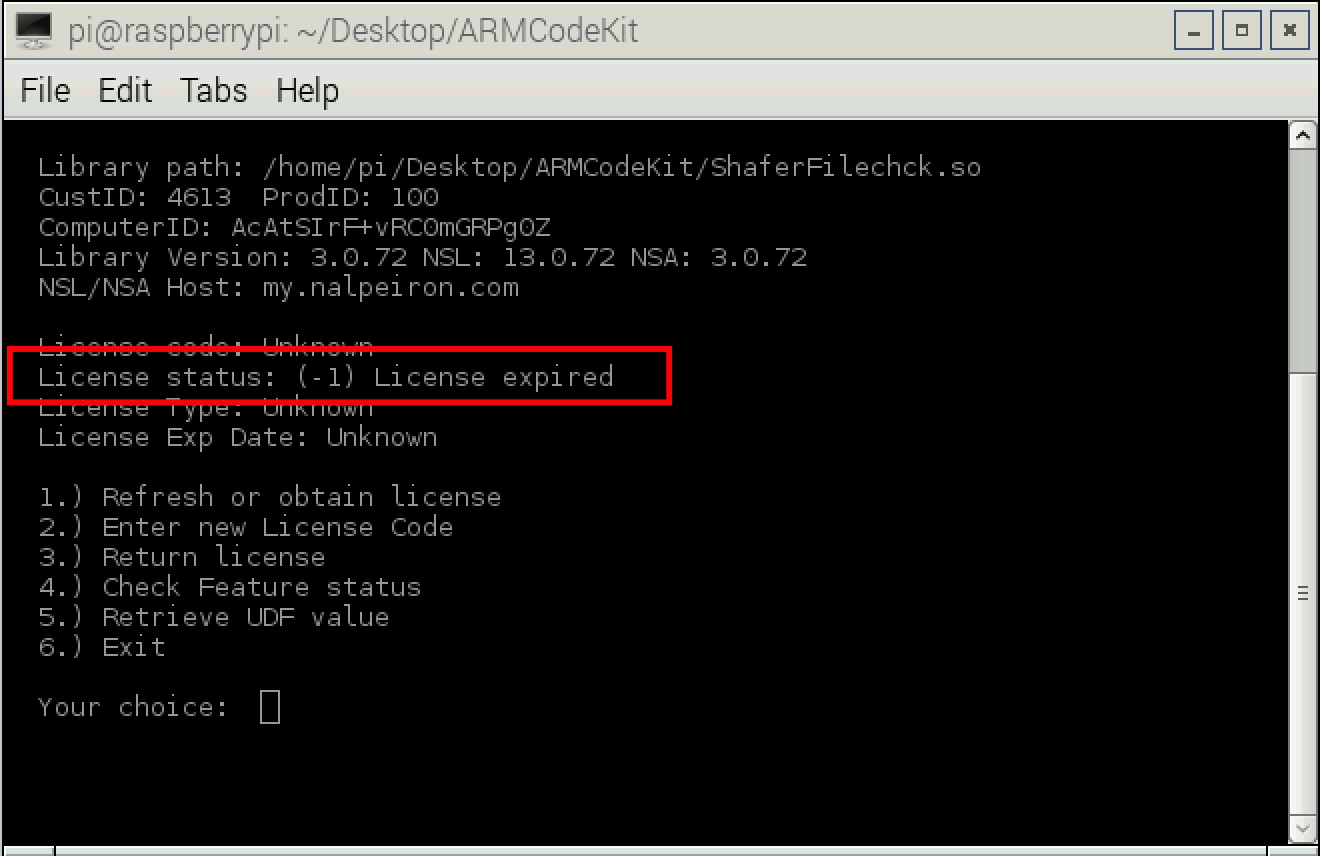
- When you start the test app. for the first time you will note it shows:
-1 (license expired) in the UI as the device has never connected to the server and is not active.
Testing Return Values
We can see this on the test app under the “license status” Possible values:
0 undetermined license state
1 valid license
2 active trial
-1 license expired
-2 system time tampering
-3 product not authorized
-4 product not found
-5 invalid license
-6 license returned to server
-7 invalid system date
-8 product in invalid state
-50 no available licenses
-110 product inactive (server return)
-111 invalid trial period (server return)
-112 ComputerID has already been activated (server return)
-113 trial has expired (server return)
-114 license number inactive (server return)
-115 number of allowed activations exceeded (server return)
-116 subscription Expired
-117 duplicate device id
Another important data point is the “ComputerID” (device ID) that you can track back on the server side to check the effective transmission of data and to track this specific device in the system.
Please refer back to this table when testing.
Setting up the Service-side test environment
You will want to see what happens end to end so the Server side needs to ready for you to switch back and forth and note changes in both UI.
The server side at Zentitle offers both an Analytics and Licensing capability. In this test, we will check the License data and control in action.
- Go to https://my.nalpeiron.com
Use the credentials provided to access the server side.
It is assumed that the tester understands the Zentitle environment and how it functions at least in a basic sense to conduct these tests if more training is required on using the Zentitle service.
- Navigate to the "license code page" where you should have sourced some test license code numbers.
- In "licensing" testing, we will reference these codes on this page, or by searching for the codes in the Nalpeiron UI server side to review changes during the test phase.
- When we test Analytics we can also ref these devices to show details within the specific device we are testing with, you can easily identify the device by its unique "device ID" as shown above in the sample code UI.
In this example, we are going to test with the Zentitle license code number: 461300000127348730
attached to the device ID: AcAtSIrF+vRC0mGRPg0Z
In addition to full license states we will also test the "trial" state and these will show up in the "trials page" and do not require a license code, therefore you will only see device IDs listed here across all trials associated with this "Product" in the Zentitle UI.
- Navigate to the "trial page" where you will see all devices attached to the server in a trial "state". For testing, we are watching for the device ID: AcAtSIrF+vRCOmGRPgOZ.
Testing the licensing
The first logical step in testing the licensing is to test a trial if you plan to use demo periods, as once you start using license codes, you will invalidate this test.
Testing trials
In testing ARM app. trials you do not use a license code, you simply deploy the device to the user, and they can start a trial period set for that “product” within the server-side. Each device will be treated uniquely and have a trial period logged against the Zentitle ComputerID tracked server-side.
To set a trial period, you will need to configure a “product” within the system (or you may use “profiles” or edit individual license codes).
We have a single test product within the system at present so we can check that and then each license code for a trial period setup.
Then you can edit the setup for this “product” in the Zentitle Service (you can change a specific license later).
This is a screen showing the trial settings for the “Device test” setup in the server-side. So these are the trial “days” you need to test against. In this case, the setup shows a 1-day trial period.
NOTE: In most test scenarios you will want to choose a trial period of 1 day so that you can quickly see the timeout response working correctly i.e. the dialog/api that you will use to get users to buy or activate their products at the end of a trial period.
The Test Sample UI (NSL)
- To start in RPi run the sample app. and review the UI.
Start nslTerm with: ./nslTerm
Once running you will have a test UI:
The GUI shows various useful details such as:
- The current library path and the Customer and product IDs parameters that should match your own. The "computerID" is a unique Zentitle ID for your device that we will use to track it on the Server side, Library versions and the server location shown above as NSL/NSA host (my.nalpeiron.com).
- The license status area shows the license state and any error numbers.
- The column of number options allows you to test various license processes.
- In this case, the starting “license status” is -1. This means, in this case, that we have no license as we are just starting testing.
Before you start testing, ensure your device has a connection to the internet over port 80 or equivalent in order to complete this test process.
Starting a trial (on the device)
- To start in RPi run the sample app. and review the UI.
Start nslTerm with: ./nslTerm
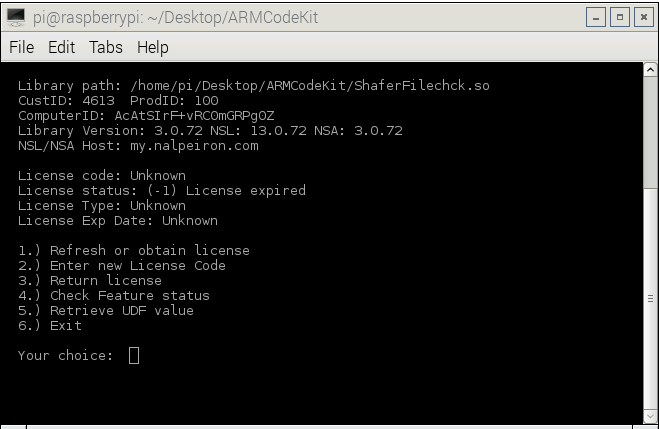
- Next, enter “1" from the options menu and hit enter.
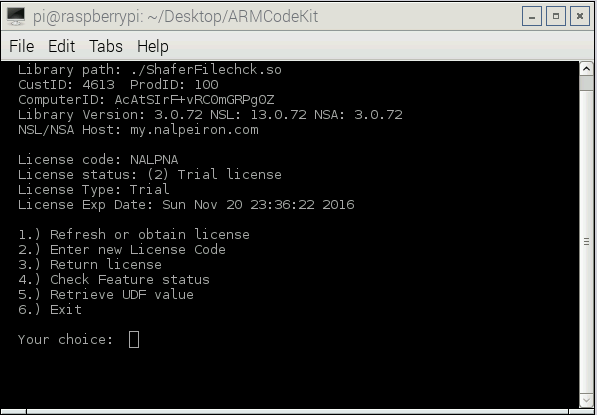
Once you have entered, the device will connect to the server (for the first time in testing) and will set a trial.
In this case, the trial was set for a 1-day period as we can see the device is reporting a trial end date of Sun Nov 20.
We can also see the license status is set to 2.
2 active trial
NOTE: Remember you can only start and run a trial before you activate, and you need to leave the dialog empty to start a trial.
Checking and resetting trials server-side
Once you have started a trial on the device you can check the server for details.
To search for the device and its “trial” mode status (before you attempt to activate using a license code) input the ComputerID for the device into the server-side and click the search button.
You will then see the trial status of that device and can see the expiry date and also reset a trial.
AcAtSIrF+vRC0mGRPg0Z
So we can see the device and the server are in sync. And the trial is working correctly.
Note: If you have already activated this device using a license code you will not see this result in the search as the trial with have been terminated and converted to an activated state instead. In the example above the first device in the list in the "activated" state. The last in the list is our test device.
- We can also see this reported on the “Device Details” page.
At this stage, the NSA analytics has not been run and therefore the data about the device noted in red has not been sent to the server.
Checking the trial expiration process
Now we need to check that the “trial” status times out correctly, per the settings.
Assuming you set one day, we have waited past that 24-hour period and are ready to check the status again.
In this case, we are going to test manually by entering '1" again but if the lease refresh rate were set at less than 1-day (as would generally be the case in production) the device would already be reporting an ended trial.
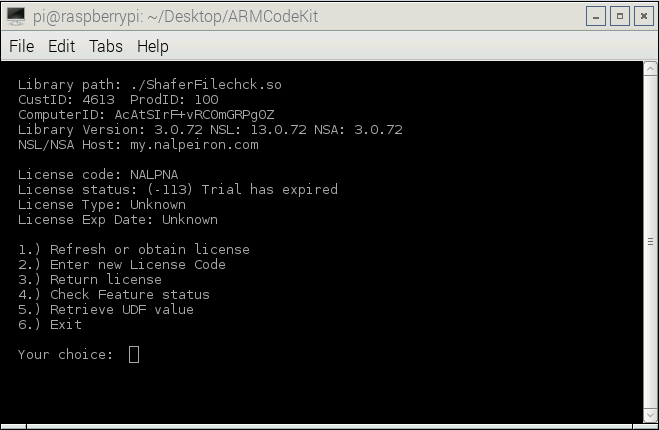
Here we can see the trial license has expired. “License status” is -113 (in your UI you would display a dialog telling the user to buy or whatever the next step in your business process is after the end of a trial period).
-113 trial has expired (server return)
To check the trial status of this device on the server-side navigate to the “trials dashboard” (see the hourglass icon) and find your device ComputerID: AcAtSIrF+vRC0mGRPg0Z to review the “Status”.
Here we can see the trial “expired” after one day as expected.
This is the end of the trial testing for this period.
Resetting and retesting a trial period
You can reset a trial period for further testing by searching for the ComputerID and clicking the “reset trial” button on a device. This process will remove the trial data from the server side.
Once reset the device can then start a trial in a “fresh” state to enable retesting.
Testing an activation using a license code
After testing a trial period, the next test is to set a license on the device.
Again the license rules and parameters can be set for every license code, in this case, the test code has been changed from the standard “Device test” setup as below to show how a code level change is possible for license rules.
Getting a test code and checking Its rights
First, you need to source a test license code from the dashboard.
- Navigate to the "license code page" where you should have sourced some test license code numbers.
- In "licensing" testing, we will reference these codes on this page, or by searching for the codes in the Zentitle UI server side to review changes during the test phase.
In this example, we are going to test with the Zentitle license code number: 461300000127348730 attached to the device ID: AcAtSIrF+vRC0mGRPg0Z
- Click "Devices & Activity" button to check this is a fresh unused test code.
- Then, Click the “Edit Code” button to check that this code doesn't have differing rules to the "product" template you set up. It's possible to set different entitlements per code so that's why we check now to ensure the integrity of the testing process.
Now you can review the code details, which may be different to the generic product setup.
Note: you must always check the rules you have set on a test license code to ensure your testing data matches the server-side setup.
Setting the license activation on the client-side
So we know we are looking for a change on the client that shows a “perpetual” license type from a trial state (not to be confused with the server call back lease period we use to check the license periodically).
- Note the test code you will be using from your Portal page and navigate to the test UI.
- Enter 2, to get the “License Code” dialog box and type in a test license code. In this case, we are using the code below:
461300000127348730
Make sure you type this number exactly as you find it on your own Portal page.
- Next, enter 1 to obtain a license from the server with the entered code.
After clicking the “1” option, you should observe the License status change in the app.
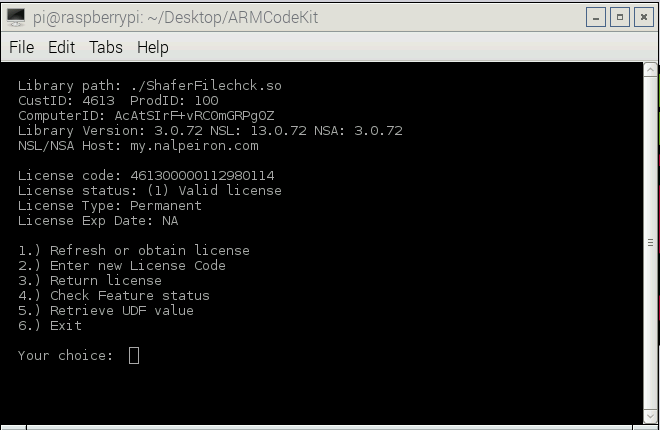
In this case, we can see three areas change; the status is now 1 = “Perpetual license”; the license expiration date has changed as has the license type.
These are parameters set for this specific license code number on the server.
1 valid license
Reviewing the server side test results
Now let’s navigate back to the server side and see the status of the Licensing.
- Go to https://my.nalpeiron.com
Use the credentials provided to access the server side.
Checking the license status on the server side
Now we have data we can navigate to the NSL licensing dashboard.
Once in the NSL dashboard, you need to use the toolbar or “search” for the license code we are testing or the device (ComputerID) to check the results of the test.
- We are check for activity on code: 461300000127348730
This will find the code in the system and allow you to either “edit” the license parameters or review the device and activity on that code.
- Click the “Devices & activity” button for this test.
- Now we can review any devices that have used this code and their status, in this case, we are looking for device: AcAtSIrF+vRC0mGRPg0Z
On this page, we can see that device along with its status and related timing for the license lease.
So the testing is working, the device status is correct at both ends, the data is passing to the server, and the server is showing the details of the device and the license status as we see it on the device.
Continuing the testing with de-activation on the client (rehosting)
Leaving the server side screens open, we can now return to the device and try removing the license from the device (de-activating) and testing that part of the process is also correct.
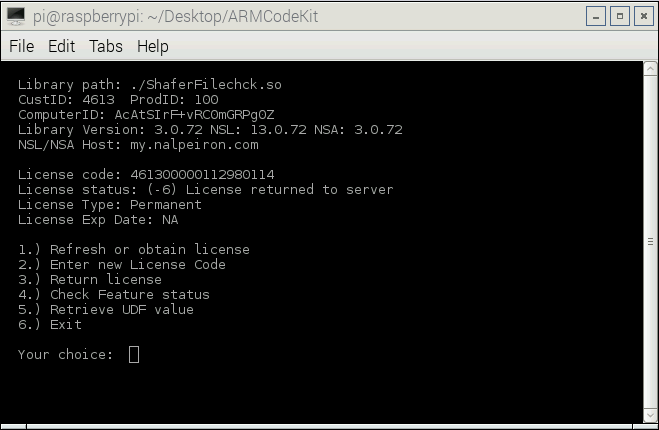
On the device screen, we can return the license by ensuring the code number is still in the dialog box and it’s the same code number.
- Enter option 3, and you should see the local license status change again.
Here it's showing the “status” is -6, or that the test license has been returned to the server, so the license is in a de-activated (unlicensed) or Invalid license state.
-6 license returned to server
Checking the server side for de-activation confirmation
Once again on the NSL dashboard, if we kept the screen for the device ID or the license code number we will see the status change after we refresh the page
In this case, we can now see the Computer ID is struck through showing a de-activated device as expected.
De-activated devices are struck through for ease of identification
This concludes the basic tests. We have successfully tested using a trial period, setting a license on a device (as a perpetual license) and removing the license from the device for re-use.
Further advanced testing
You can now go on to test more scenarios like other business models, features, concurrent licenses and more.
Testing different license types (perpetual, subscription and fixed end date)
On each license code, you can set a different business model e.g. perpetual, subscription, fixed end date and concurrent. We have tested perpetual models above.
Testing subscription models
To test a subscription-based license you need to edit a license code and set the parameters below for testing, then activate using this new code and check the results.
- First, navigate back to the Publisher Portal and choose a different code to the one used earlier
- In this case: 461300000127348730
- Now click "Edit Code" to change it's base "perpetual" settings to a "subscription period" based entitlement.
- Set it to a duration of 1 day and click "save"
- Now we can activate this code: 461300000127348730 on the client device and check the license state set and time to subscription end for 1 day.
- On the client device enter the new code via option 2, then enter 461300000127348730.
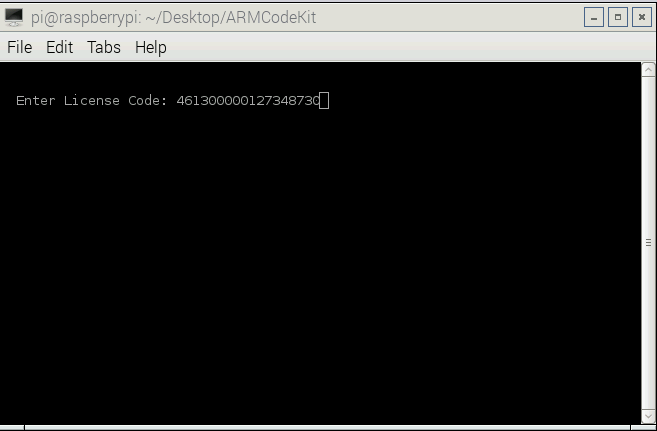
- Then enter option "1" from the main menu options to refresh the license.
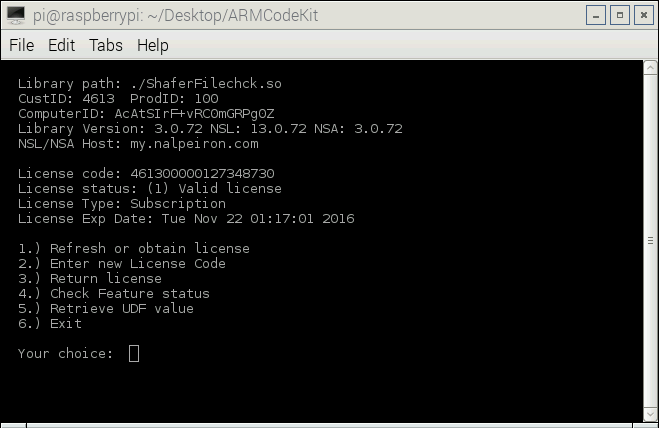
The results show a switch to a License status: “Subscription license” with a license status: 1 (licensed) and a License expiry of a day later.
1 valid license
- Check back on the server-side against code: 461300000127348730 using the search method previously shown, find the code and click the "edit" button.
The license code page gives us details on the “timing” for the device that is activated on this license. This matches the end user device UI as well so the service is working correctly.
Checking the subscription times out at expected
Now we will wait for the 1-day period and check again to ensure the license times out as expected.
- Once again enter "1"
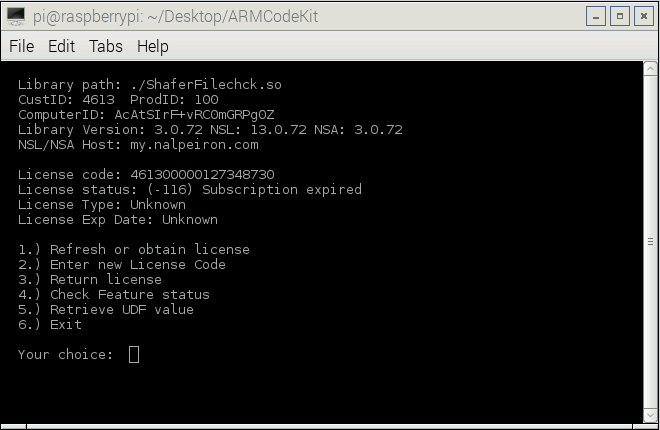
Now we can see the license has timed out as expected and is reporting license status is set to -116 (expired)
-116 subscription Expired
Checking back on the server-side against code: 461300000127348730 we can confirm server-side that the license has expired.
Testing fixed end date
To test a date based license you need to edit a new license code: 461300000127348730 and set the parameters below for testing, then activate using this new code and check the results.
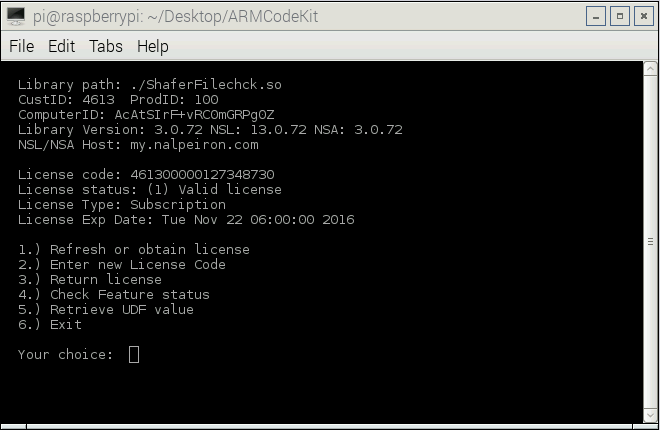
In this case, our license is set to end on the date of 11/22/2016.
Note: The date set on the server-side is for 12:00 CT. As the testing is from Palo Alto (PST) the device is reporting it’s local time and showing a date/time of 2 hours different. This is correct!
- Now we can refresh this code: 461300000127348730 on the client device and check the license state set and license end.
Here we can see the license status is set to 1 (active) with an expiry date of Nov 22 06:00.
1 valid license
- The final step is to wait until the expected “time out” end date/time and see if the license expires on the client as expected.
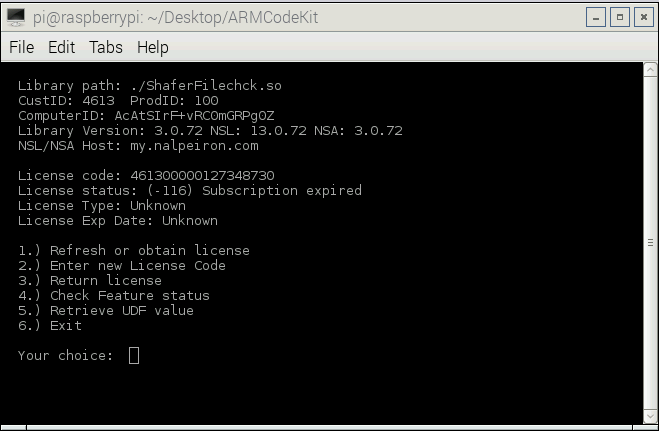
Now we can see the license has timed out as expected and is reporting license status is set to -116 (expired)
-116 subscription Expired
Testing blocking Unauthorized clients
When you set a license code you can limit the number of active devices using it (clients), we can test for this as well.
Here we can see the active client "allowed" limit is 1 and we already have the 1/1 "active".
- Testing on a new device (note the new ComputerID: iJClVg53emddnNI0A4lj), one not used before.
- Next retry the previously used code: 461300000127348730 on the original and now 2nd test device.
- However, the license set to a max limit of 1 device.
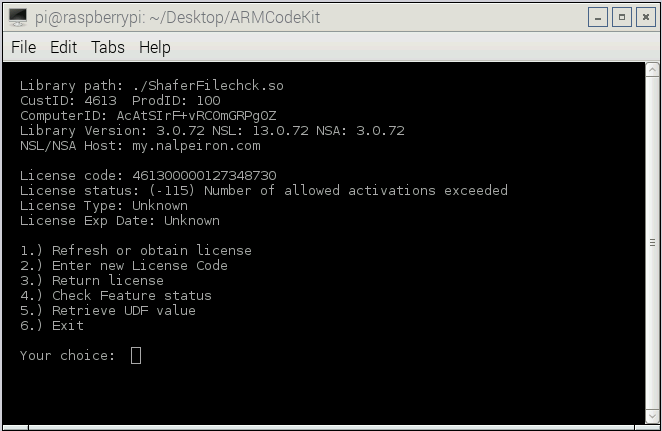
- Clicking “Get license” on the new device shows a return value license status of -115 and doesn’t allow any activity on the server. This is the correct behavior.
-115 number of allowed activations exceeded (server return)
Testing features
Now we can test the control of features on a trial and activated device.
In this test case, we have added a feature called FEAT1 to both the device and server side so we can see that being enabled.
This can be set several ways, in this case, we set it at the “product” setup level, under the "advanced options", as below.
The same feature tag is coded on the device for testing.
NOTE: For more details on setting features, go the to docs.
Testing feature Activation
In order to test control of features, you must first set up your “products” or codes to enable a set of pre-designated features tags.
In this case, we have already added a feature called FEAT1 in the test apps and the server-side as above
All we need to do to get started on testing is to edit a license code and enable the feature in trial and/or activated states.
- Find the code you wish to enable “features” via search or the license code list (box icon).
- At the bottom of the page is the “features” tab you will see FEAT with a radio button option next to it.
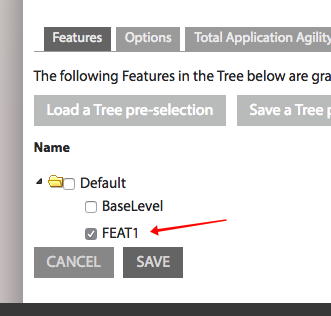
- To enable the profile with the FEAT1 feature tag select that and check the box, then click "save".
- Next, return to the test app on the device and run that.
- Enter the license code: 461300000127348730
- First, enter "1" to set the perpetual license
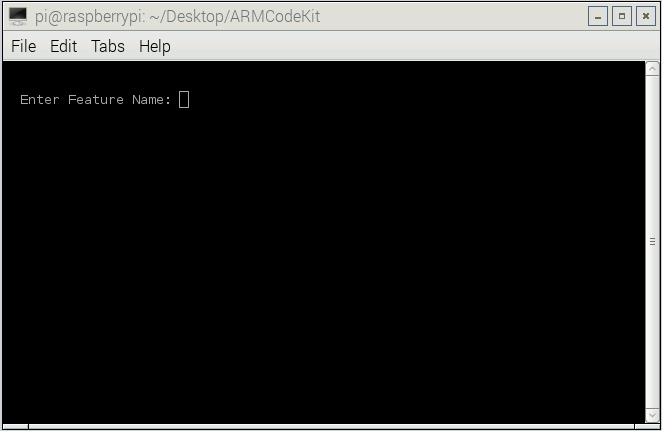
- Then enter "4" to check feature status
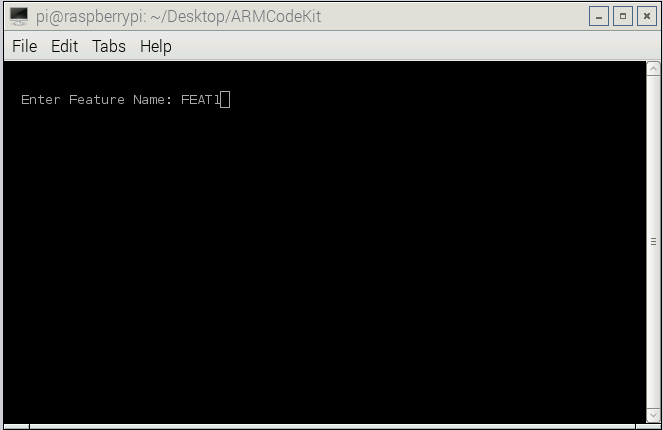
- In the dialog enter FEAT1 with the device keyboard and hit enter to query the server for FEAT1 (it must be set "active" on the server to pass this test).
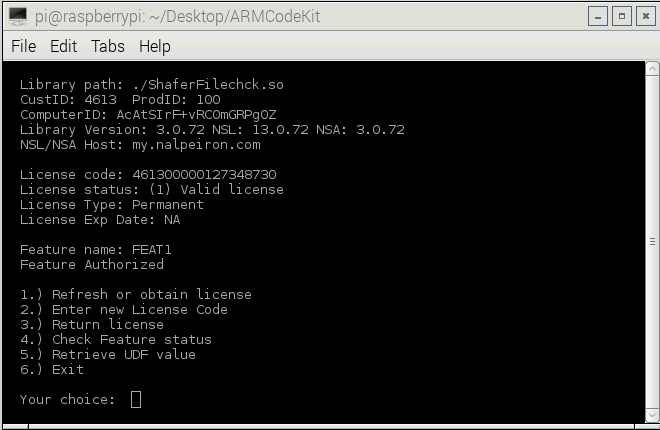
- Below we can see the server responded with "Feature authorized" showing it is live on the server side.
Note: You must type in the feature name exactly as it is on the server, it is case sensitive.
As we can see from the device the license status return is 1, or feature active.
1 valid license
Failure mode for features
If you check for a feature and that feature has not been enabled in the server-side license i.e. it's in the local client but not on the server you will get an error when checking a feature as below.
- Enter an invalid feature name and hit enter
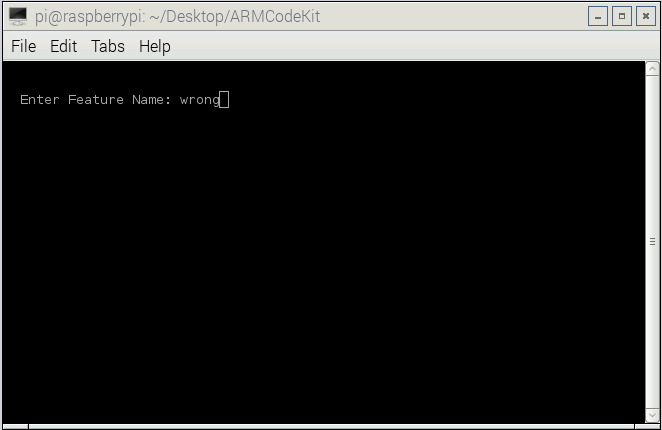
- In this case, the error return -1096 means the XML tag requested isn't present in the license file.
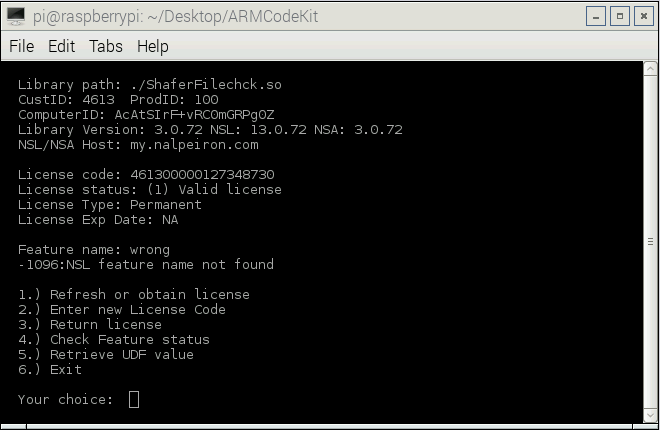
If a feature is disabled, it is not present in the local license file so when the client looks it up, it cannot find and returns an error code for XML lookup failed.
Testing Application Agility (UDF)
Now we can test the control of your own data (UDF: User Defined Field) on a trial or activated device. We call this feature Total Application Agility (TAA).
In this test case, we have added a field called UDF1 with a value of "UDF1" to the server side so we can see that being enabled on the client.
This can be set several ways, in this case, we set it at the “product” setup level, under the "advanced options", as below.
NOTE: For more details on setting Total Application Agility (TAA) go the to docs.
Testing TAA/UDF Activation
In order to test control of TAA you must first set up your “products” as above and then test a specific code to enable a set of pre-designated key-value pairs.
In this case, we have already added a field called UDF1 to the server-side as above in "product" setup.
All we need to do to get started on testing is to edit a license code and edit the TAA field by adding a value.
- Find the code you wish to enable “TAA” via search or the license code list (box icon).
- At the bottom of the page is the “TAA” tab, select that and edit the field next to the UDF1 field name.
- Add the test field data UDF1, then click "save".
- Next, return to the test app on the device and run that.
- Enter the license code: 461300000127348730
- Then enter the "1" option to set the perpetual license (as usual)
- Then "5" Retrieve UDF value
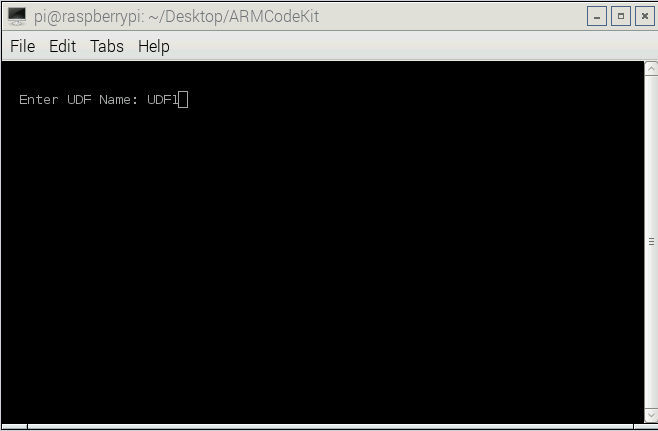
- Then enter "UDF1" with the device keyboard and hit enter to query the server for UDF1
- The server returns the data in the key value pair, in this case, UDF1 again.
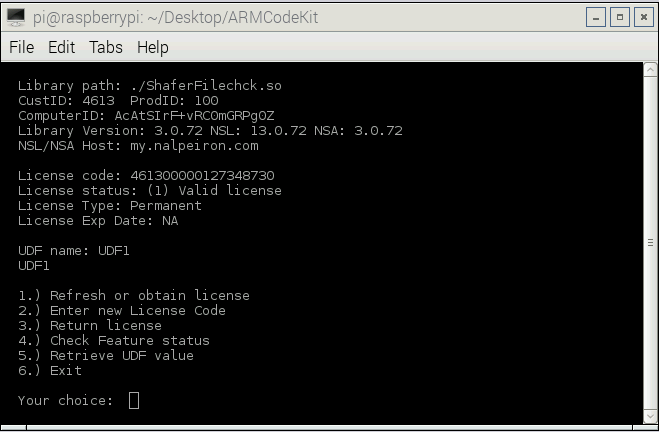
Note: You must type in the UDF name exactly as it is on the server, it is case sensitive.
As we can see from the device the correct data has been returned fro the record on the server side as expected.
Now let's change the data server-side and recheck that the data is updated on the client-side.'
- In this case, we are going to change to "Testing again" as the 2nd data string on the server.
- Log back into the Publisher Center and navigate to the license code as above, and edit the TAA field data. Click "save".
- Next, return to the test app on the device and run that.
- Enter the license code: 461300000127348730
- Then enter the "1" option to set the perpetual license (as usual)
- Then "5" Retrieve UDF value
- Then enter "UDF1" with the device keyboard and hit enter to query the server for UDF1
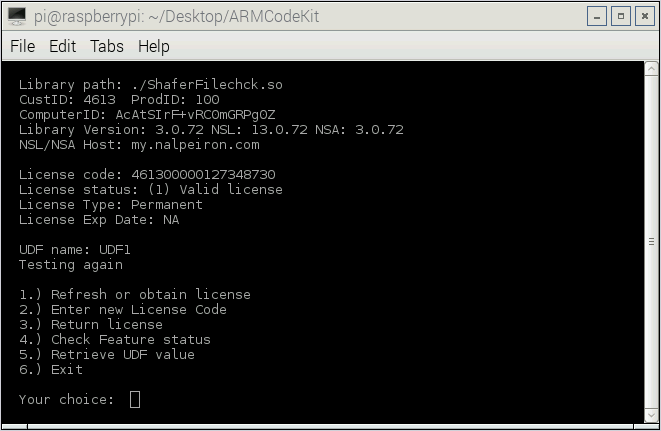
- Now you can see the returned data has changed and it shows the correct new value "Testing again" as expected.
Failure mode for UDF
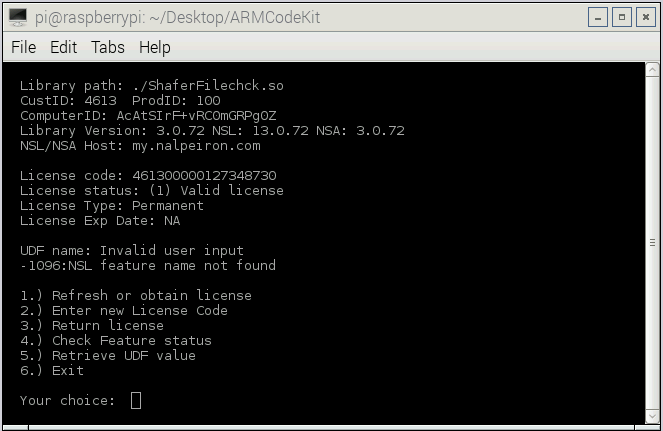
If you check for a UDF field and that field has not been enabled on the server you will get an error when checking a UDF as below.
- Enter "5", then leave it blank and hit enter i.e.no value
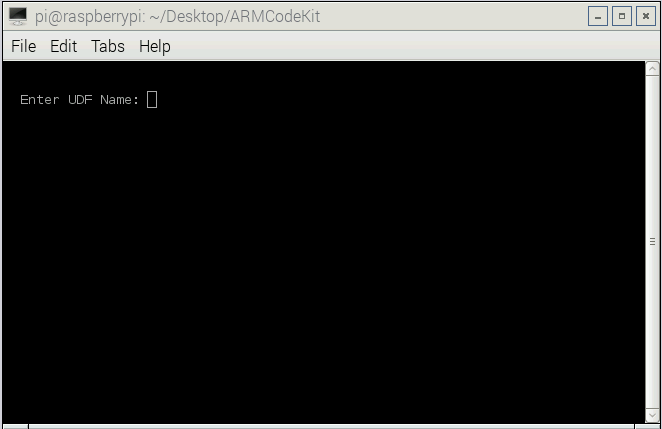
- In this case, the error return -1096 means the XML tag requested isn't present on the server.
Testing the Analytics
In addition to sending the license data, we can also capture more information about the devices used in the Analytics test.
The simple test is to send extra data that you can review both in the NSL (licensing) dashboard as well as on the Analytics side (NSA).
In this case, we are looking for data associated with a device and not a license code.
- Start the testing by ensuring you have loaded the NSA version of the sample code.
- You will need edit the sample project exactly like you did with the NSL (licensing) sample with the correct parameters from your Publisher Portal (Customer and Product IDs and Constants). See the beginning of the article for details.
- Once your ready you can run the nsaTerm sample code.
Start nsaTerm with:
./nsaTerm
Testing the basic Analytics capability
This is a three-step process.
- First, we need to set the privacy settings on the client to allow for us to send the data - the default is OFF so there's no need to change anything for testing sending data.
- Then we need to collect the data by "running analytics collection" to populate the data file ready to send.
- Then we need to send that data to the server side for review - the default is to send the data automatically and immediately, but if you are not connected to the Internet at the time of testing you will need to send the cache data.
- Optionally, we can also chnage the user definable data fields and send that data.
In a real deployment, the client would be sending this data to you in real-time but in this case, we are forcing the data up the server to meet our own needs for testing here.
Getting started
- Open the folder containing the nsaTerm app sample and your ShaferFilechk.dylib file
- Enter ./nsaTerm (in your command or terminal app in your test OS with the nsaTerm app in it).
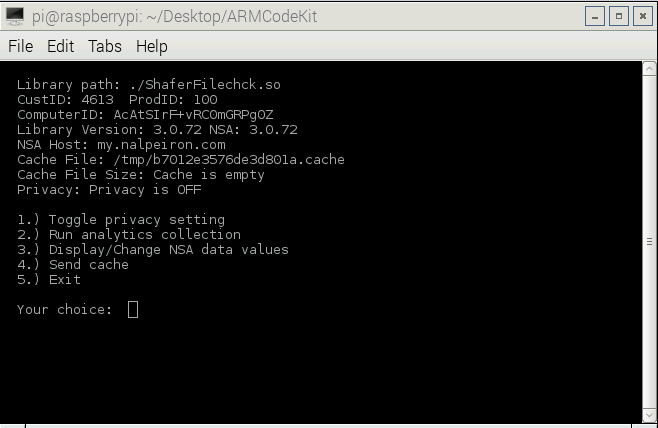
- On the NSA test screen, you can note the ComputerID again to search the server-side in the next step: AcAtSIrF+vRC0mGRPg0Z
- You can see the default privacy options to allow the client to send data to the server are set to OFF (you can toggle that ON/OFF with option 1 for further testing of data blocking)
- Now you simply send the embedded test data to the server by entering "2" from the menu and hitting enter
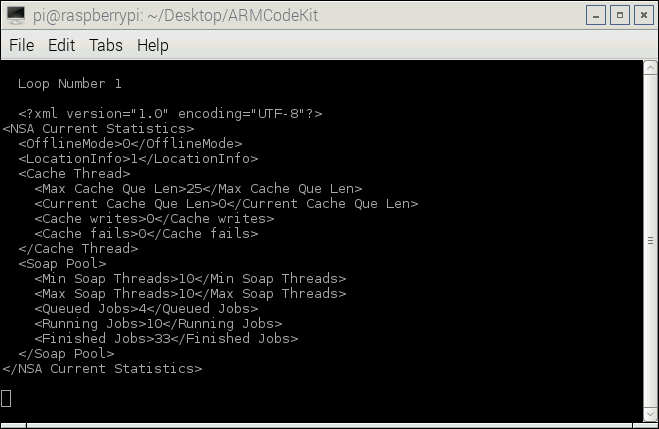
- You will see a looped data set being created and that will be sent direct to the server immediately (assuming you have an open Internet connection)
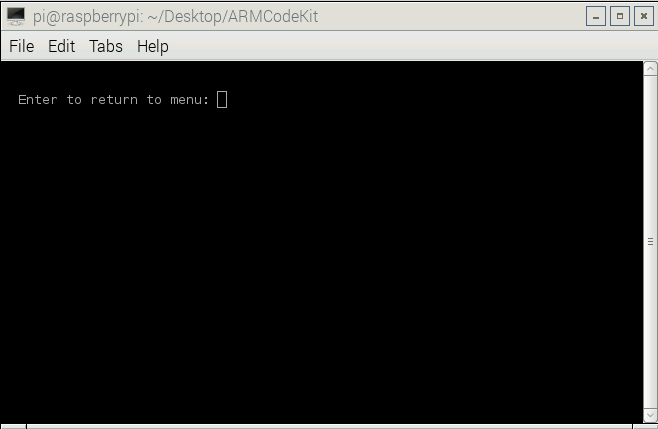
- When the process is complete, you will need to hit return to get back to the main menu.
- If you had an open Internet connection the data will have been sent and here you can see the "Cache is empty" which is expected.
That’s all that’s required for this test; now we navigate back to the server side to see the results.
Checking the server-side Analytics data
Login to the server portal:
Go to https://my.nalpeiron.com
Use the credentials provided to access the server side.
Now we can review the device: AcAtSIrF+vRC0mGRPg0Z by searching for it in the NSL dashboard.
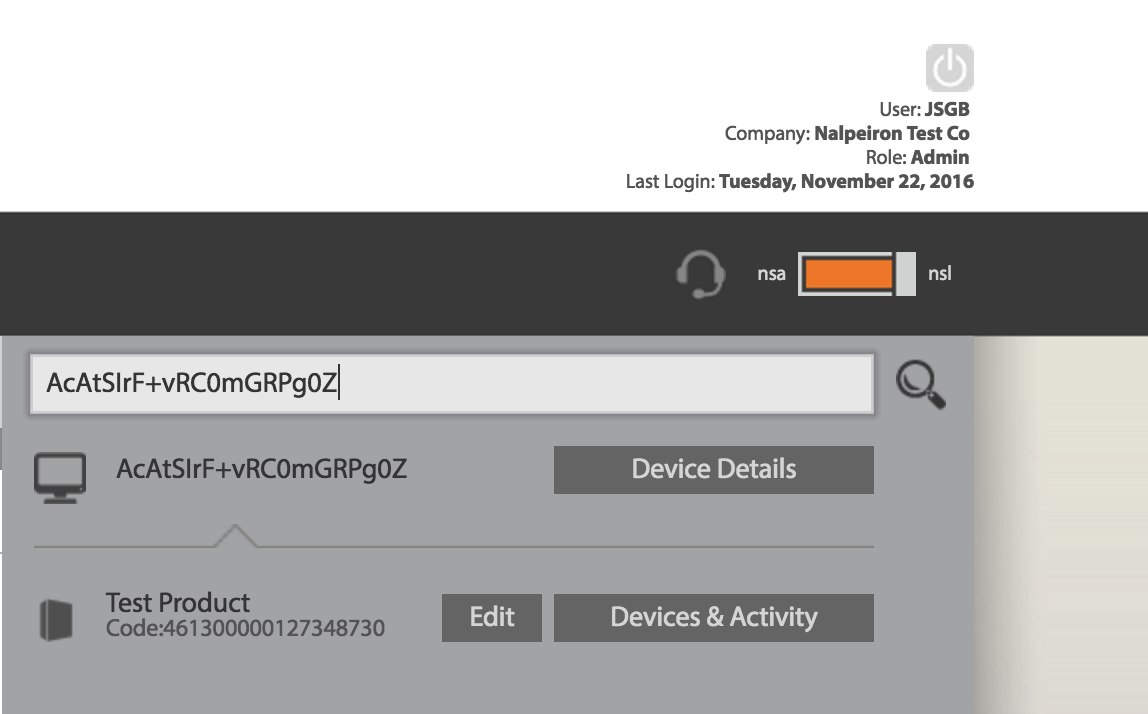
Simply copy the device ID into the search dialog box and then click “Device Details” button.
Before you run the NSA test on the device you will have no detailed analytics data associated with the server-side record, as shown here:
After running the NSA test on the device you will then see more detailed data come into the record:
So this test worked well the default data was sent to the server showing the environment data from the device and also default field values.
Editing the data you send up for testing your own values
- To send your own values you can enter option "3" to change the data sent to the server.
- On the next screen, you will see the default values.
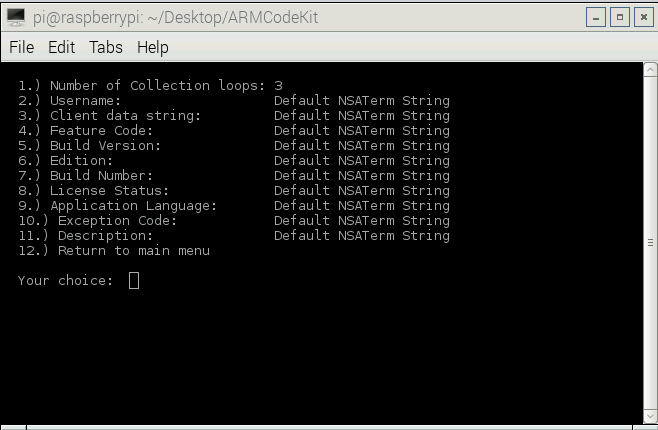
- Change these by entering the option number from 1-11 and changing the values.
- Once you have made some changes enter "12".
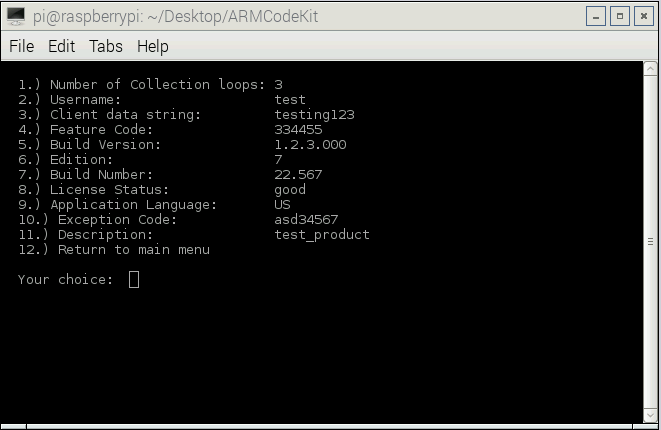
- Then enter "2" to resend the data to the server.
- Now you can re-check the server side under the same DeviceID as before as below:
If you edited the data fields for testing to your own values the record on the server will look like this example.
This is the end of the Analytics testing for this device.
Of course, there will be more meaningful data in NSA once you have many devices sending data back to the servers, this is discussed in detail within the docs on NSA.
Licensing and Analytics can be used together in your final project.