
Introduction:
In this article, we are going to explain how to test the licensing process and client/server interactions.
There are two levels of testing with Zentitle, the initial testing where we are checking that the components are working together - we did that in the previous step when adding the code to your application and we continue that here. Then there is advanced testing where we try various license use cases to ensure a real deployment will function as you are expecting.
We recommend you do one and then the other, the latter being designed for developers who are happy working at a "deeper" level with the code and system.
Within a trial, the first test is useful to show how Zentitle works and to illustrate the basic functionality. The way Zentitle licensing works is to triangulate between your code, our library and our licensing cloud (and license codes). So testing includes ensuring all those areas are communicating together effectively.
WARNING
Before you do any testing it’s important you understand important Zentitle concepts:
- The timezone and timing issues with remote devices and the server clocks.
- The use of a server lease period (server call back timing) and how that’s reported.
The Zentitle servers are all set for CT (Central time) but your test device will be likely set for your local time i.e. there is likely a difference in baseline times, your device and the servers will be different and you need to consider that when testing everything. What the server reports is correct, therefore how your device reacts to the actual set times may “appear different” on the local device test screens. For example in one of our tests at the Palo Alto office (PST) the device was reporting a day different vs. the server. All was correct as PT is 2 hours behind CT but it appeared odd at first sight.
Zentitle has the concept of a “server lease period”, this is the callback time to the server to re-check the license server-side. This can be set at both a “product” and “license code’ level under the “Options” settings.
If set to '0', no lease call back schedule is set and hence End-Users will not experience any future requirement for re-activation.
The lease period is reported in the UI alongside other timings like Activation timing and the end of actual licenses. This can be confusing if you are not clear what dates you are looking at on the screens, please pay attention to these key differences when testing. In most cases, you are ignoring the lease call back timings and simply looking at the actual license dates.
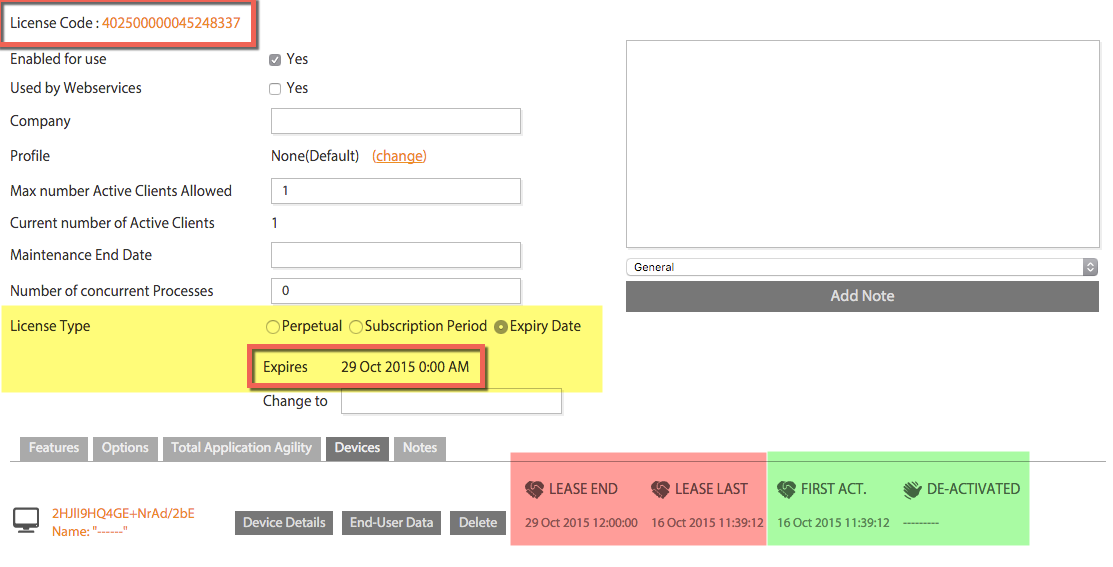
Looking at the screen above is a great example of confusion, this license code is set to perpetual with no fixed license lease period so it defaults to the period set in the license. That means we have two identical dates – yellow 29 Oct is the actual license date, in red we have the lease refresh date which now happens to match the license date by system default. It is not the license date, it’s the time the device will call the server next. Not to be confused! The green data related to license activation processes, in this case this license code was activated on the device on 16 October setting a date of 29 Oct on the device.
- In addition, you must be aware of how the license will change between client > server based on the lease settings i.e. the server will refresh the client based on the lease timing ,if you set the lease to never refresh then you must do it manually as we are in testing below. However, if you have it set to refresh the license lease every hour then your test case could change a great deal based on any changes on the server side!
- For example, let’s suppose you have license code A set as subscription license that expires on Nov 22015and that license is used by a device. The expiration date of that license will be Nov 22015. Now suppose you edit the license to expire on Oct 202015and save that change on the server-side. The license now has an expiration date of Oct 202015 but the device knows nothing about this. Last time the device checked out license code A the expiration date was Nov 2 2015. Since the expiration date on the device is Nov 2 2015, the "Lease End" will show Nov 2 2015 even though the license now has an expiration date of Oct 20 2015. The "Lease End" date won't change until the device has refreshed its local license (with a call to NSLGetLicense) and got the new expiration date. So depending on when you licensed your device and when you edited the license code's expiration you might have various dates here and there. Also, note that a perpetual license has an expiration date of Jan 1 2037. So if a device has a perpetual license and you change the license code to a subscription, until the license refresh you will probably see an "Ends" date of Jan 01 2037.
Gathering your resources
Before you get started on your testing you need to have gone through the previous steps in our getting started guide.You should now have ready in your test setup:
- Your own licensing library.
- A test application (or your own app.) that has been edited to match the library settings (Customer/Product IDs and Constants).
- The tool to delete the client-side records after each cycle.
- A Product Setup on the Publisher Center with license codes allocated for testing.
- A set of Zentitle License Codes to test (that have been allocated to the test product).
Download your code example
Getting Started
Once you have your test machine(s) setup and your /bin folder with the files required you can start the functional test process.Let's put all we have learned in the getting started guide together for this final process.
Step by step review of the total process from the start
Use this link to get the code sample projects
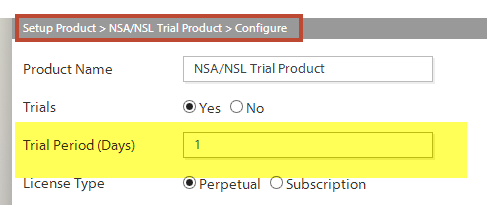
2 Setup a trial product to test with and set the trial period to one day. You should have done this already within the trial dashboard.
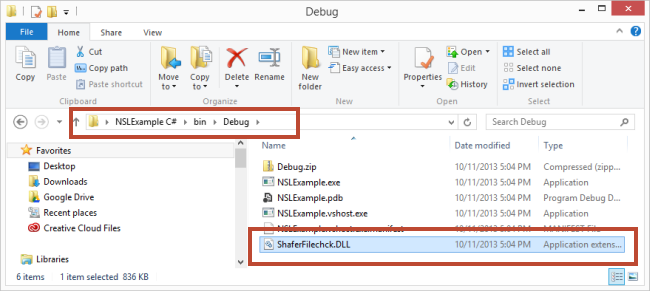
3 Download the Zentitle Library (based on the settings in the product) and place into the /bin folder you are using for testing.
Testing Process
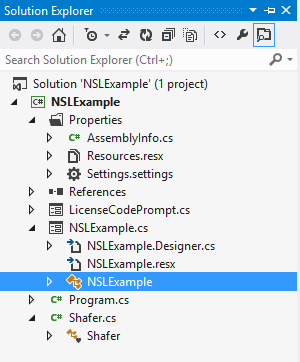
4 Edit the Visual Studio Example Project Solution (NSLExample.sln) on your Test Client Machine.
int CustomerID = 3386; //**** REPLACE WITH YOUR CUSTOMERID
int ProductID = 100; //**** REPLACE WITH YOUR PRODUCTID
UInt32 SecurityConstantX = 100; //**** REPLACE WITH YOUR Security Constant X
UInt32 SecurityConstantY = 600; //**** REPLACE WITH YOUR Security Constant Y
UInt32 SecurityConstantZ = 300; //**** REPLACE WITH YOUR Security Constant Z
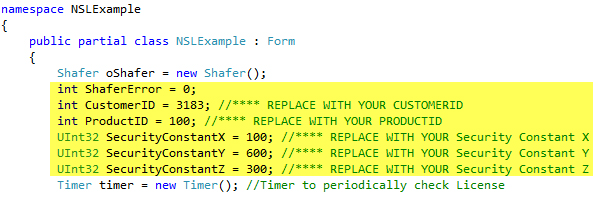
- Edit the NLSExmple.cs file in the Solution, or the other code examples with your editor.
- Change the following values to the Customer/Product IDs and Constants you noted from the library you created earlier.
- Save the project.
You should now get a dialog box showing you the status of the license (assuming you have all the components in the right places and the Customer/Product IDs and Constants all match each other).
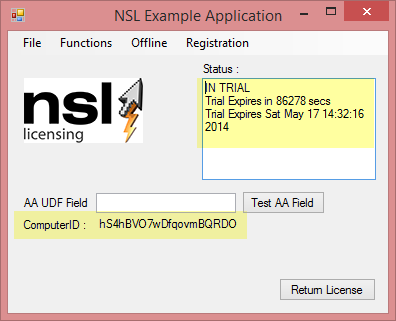
The Status should show the product in trial and the expiry date, and your unique ComputerID.
5 Check the server-side data exchange.
Now check the connection to the server side by logging into: https://my.nalpeiron.com
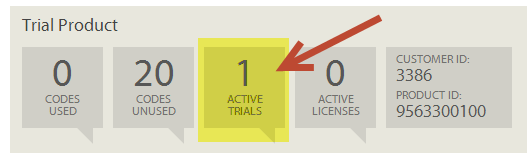
Your trial dashboard shows you that you now have a trial running.
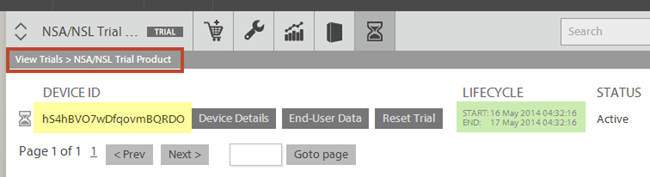
Now navigate to the "trial management dashboard" and this should show a trial with your test "ComputerID" as we showed you above and the record will show the expiry date and when the trial was first started so you can confirm your test actions.
6 Testing the trial period.
Now check the trial timeout process by waiting a day (or whatever you set for the trial period) for the Trial to expire.
Now check the connection to the server side by logging into: https://my.nalpeiron.com
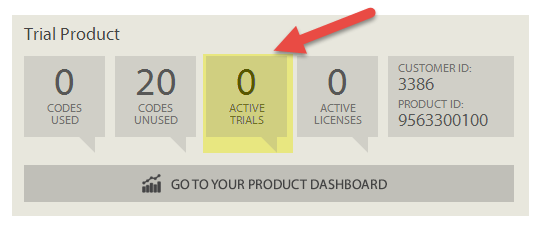
Your trial dashboard shows you that the trial has now ended (and therefore no longer active).

Now navigate to the "trial management dashboard" and this should show an expired trial status with your test "ComputerID" as we showed you above and the record will show the expired end date and when the trial was first started so you can confirm your test actions.
- Now you can Re-run the test client application by going back to the /bin/debug folder or opening Visual Studio and running it from there.
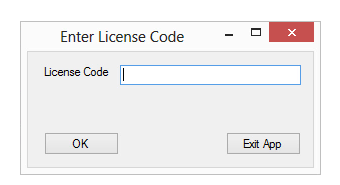
- The "trial" should have expired on the client-side too and a License Code Prompt dialog box should appear to allow you to enter a valid license code to activate the client (see the next step to getting the required code and activating).
7 Testing the activation process.
Now check the activation process and switching from a trial into an activated license state. First we need a test license code to test the activation process.
Please check the way you have set the License Code before testing with the code then you will know the correct behavior when testing, it's easy to grab a random code to test with and not get expected results as someone has set differing values with that specific license code.
- Login to the activation server, if you have not "allocated codes" for your product please do so - otherwise skip this step.
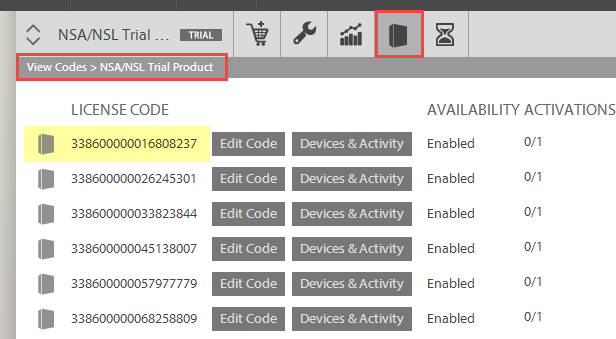
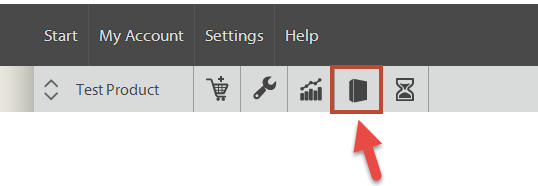
- Navigate to the "license management" dashboard (the icon with a box) to show the codes you have allocated to your test product.
- Copy (into your clipboard) one of the License Code numbers for testing, for example 338600000016808237.
- Next, Paste from the clipboard into the example application License code prompt dialog from a previous step, then click OK.
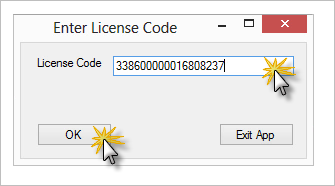
- The status of your application dialog should change to show a Perpetual License.
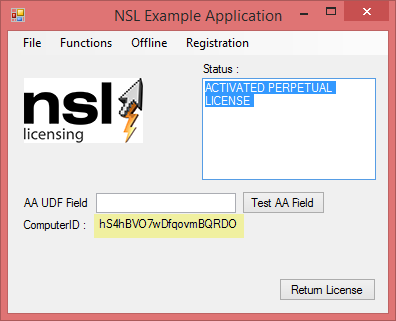
8 Check the license data collected
Now check the data you have collected and review the useful business information.
- Navigate back to your trial dashboard to see the changes. Now you can quickly see that we no longer have an active trial, that has been converted into a "used code".
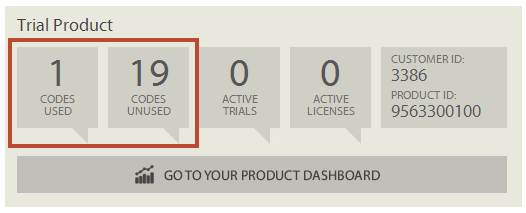
- Then click the "license management" dashboard (the icon with box) to show the codes you have allocated to your product, find your test code and you should now see that its reporting as "activated" with 1 of the 1 available "activations" consumed.
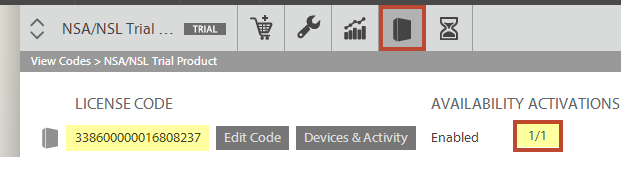
- Then click the "Devices & Activity" button.
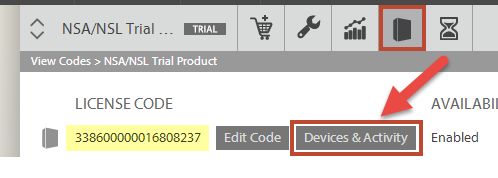
- This should show an activation for this code with your ComputerID.
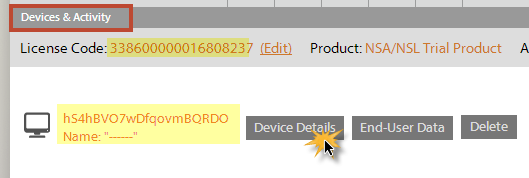
- Click on the Device Details button.
The system details section has three main areas:
- The "environment" data from the machine such OS, CPU etc.
- The "geographic" details about the location of the installation.
- License codes associated with this device
Now test the ability to "return" the license to the server. This is the process end users will use to move between PCs or when they move to new hardware etc. They temporarily store the license back on the server, make any changes they need, and then re-activate on the new device etc. Its very helpful and convenient for the user and only takes a click.
To test this function, we are assuming you are using an activated a test license code, and assuming you are now in the "activated" state in the UX. It's best to double check this before testing.
- Next, click the "return license" button to return the license to the server and de-activate the client.
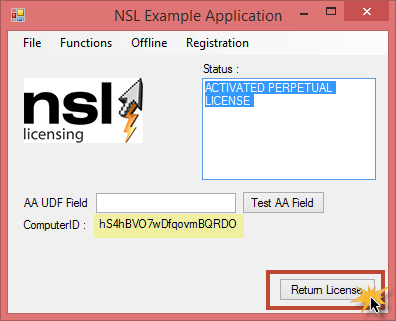
- This process will show you a confirmation dialog, click "OK".
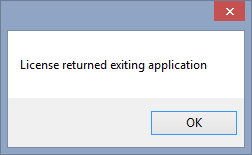
- Navigate back to the "license management" dashboard (the icon with box) to show the codes you have allocated to your product, find your test code. You should note that the activation "count" has now reduced by one (1).
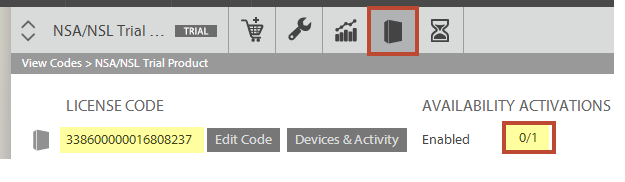
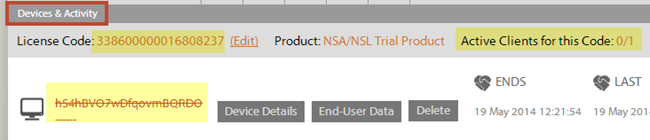
- Click the "Devices & Activity" button. This should show the ComputerID "struck through" to signify the license has been returned to the server and is available again.

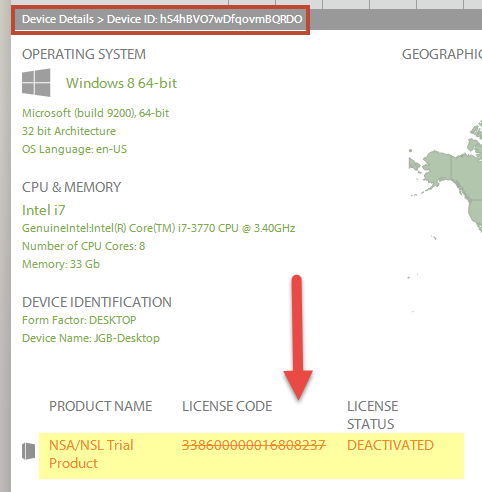
- Now you can re-activate to test that the License has been removed from the client and is now available for re-use. Simply re-start the test application and once again you should get the Dialog with the "activated" state displayed.
10 Test license management controls.
We now need to double check that the limits on a license we have set are working to control the number of activations (installs) of our product.
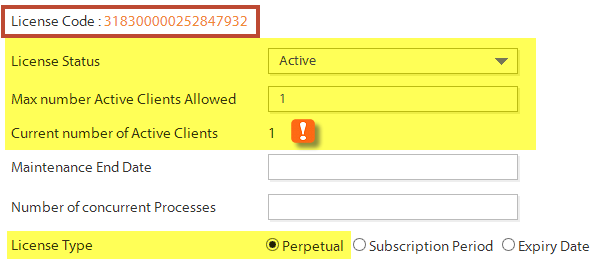
Go to the publisher center (as before), and the license management dashboard, click on the test code. You will be able to check the status here:
- The license is "active
- Max no. active clients are 1
- The no. of existing clients using this license (activated)
- This license is "perpetual."
The expected results when we open another instance of the application are:
- If we try and activate on the same license code (318300000252847932) we will be denied a session as we have another active session elsewhere.
- Open the test app (/bin/debug/NSLExample.exe) or run the app. from within Visual Studio.
- A dialog will display instead of the starting the app.
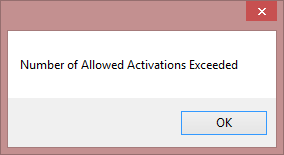
So this is the dialog the test app. displays, the use of the application has been denied, and you get the alert that the "No. activations allowed" has been exceeded, that is correct behavior.
You can now try to "return" the license on the activated PC (deactivation) as shown in step 9, and check an activation count gets released so you can repeat this process and in this case, it should activate again without restriction.
The end of Testing
This completes a comprehensive end to end test of the Zentitle Licensing Service.If all stages were successful you have shown that you can take all the steps necessary to control and license your application using Zentitle.
You can do further tests based on the same basic process now, perhaps trying differing business models like subscriptions or longer trial periods.
Rinse and repeat
Now you have completed a basic test, you can continue with your test plan and ensure your own application works and the business model you wish to deploy is fully understood and documented.The way to test (again and again) on the same machine is to:
1Setup and run a test scenario.
2Delete the current test files.
Delete Server-side Records
Remember we have "activated" a trial so this time we need to go to the "license management" dashboard to find the code we have used. The "license management" dashboard is highlighted below (box icon) in the product toolbar.- Then click the "Code history & Analytics" for the specific test code you used to activate.
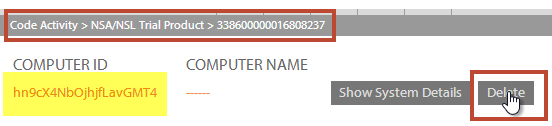
- Then "delete" your test PC record (we call that a "Computer ID").
Make sure you're editing the correct test code.
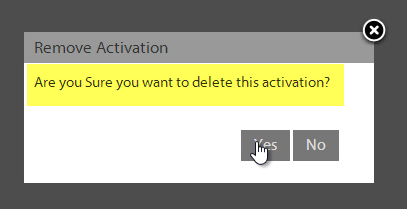
- You will be prompted to confirm the deletion, click "yes" to finish cleaning out the server side record.
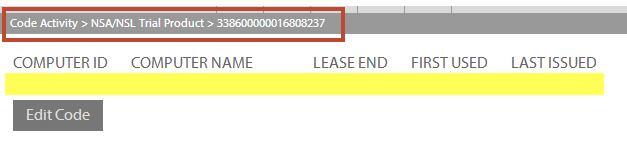
- Now you are able to see that the records for that license code are back to a 'clean" state and can move on to the client-side cleanup process.
Before cleaning up the client-side here’s some useful information.
In V10 client-side everything is kept in the WorkDir. The WorkDir is specified as a path passed into the library's initialization routine (NalpLibOpen). You can clean out everything from the WorkDir without harm and for a truly clean start, I would recommend doing so. That dir contains the license file, the log file, the cache file (for NSA) and system info file. The only one that must be cleaned out for a fresh start is the license file.
Delete Client-side Records
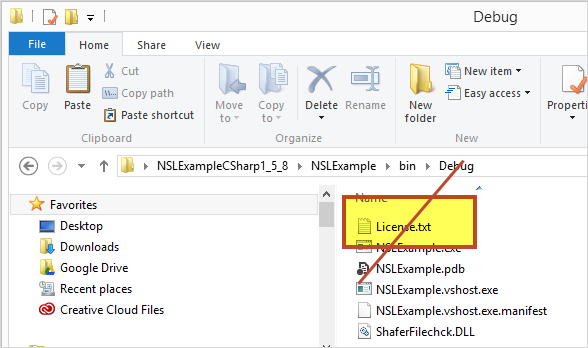
Now we have to remove the records on the test PC itself, these are hidden files and records on the local device.1First navigate to your test /bin folder where you have placed the Zentitle Licensing Library and your test app. Then find the file "License.txt" that was generated by the activation process and delete it.
2Then delete the client-side files using our "wipe" (NSL_Delete_License_Table.exe) tool that you will place in your application test folder as below.
 Download the tool (see attached)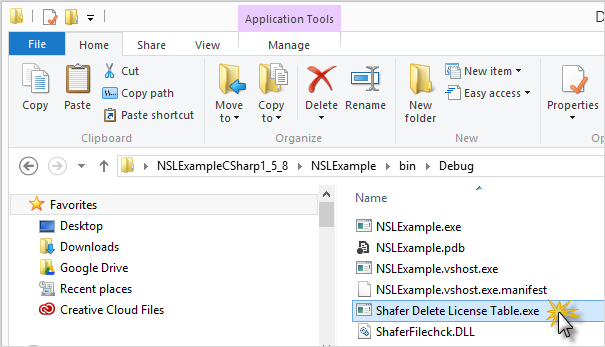
- Unzip and launch the tool and you are done. The tool will simply close after you use it.
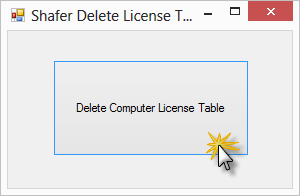
3Now repeat the test cycle on a new OS, or with a differing model to check it works the way you are expecting.
Common mistakes and error modes
If you get the following errors it's simply due to not following the processes and you will need to just check back and complete them and it should be fine.
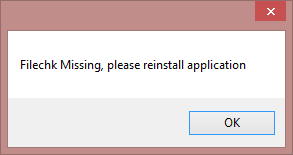
1If you see the "filechck is not valid...." error that means that the Customer/ProductIDs are not matching in the chain. Usually, the application code does not match the numbers in the Zentitle Library you have created. Just check back through and make sure all the numbers match, also any constants you have set, and finally be sure you used the last 5 digits of the Product ID less any leading zero (0)s.
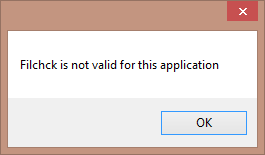
Then try again and it should work fine.
2If you get the "ComputerID has been activated..." error that could mean that the license code used in the re-activation process you are testing is looking for is not the same as tested or is empty in the associated support file "license.txt" in your /debug test folder. Check there is a code number in the file and that it matching your test process.
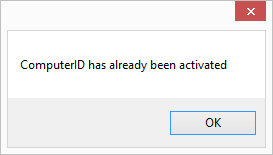
3If you get the "ComputerID has been activated..." error that could also mean that the "older" test cycle has not been cleaned out and the Zentitle service still has a record that this PC (ComputerID) has already activated and is "active" and this is preventing a 2nd activation of the same machine.
Go back through the "deletion" cycle above and make sure that the records locally and server-side are removed and re-try.
Congratulations!
You’ve now learned the basics about Zentitle and can get started right away.